Consideration of the relationship of the gingiva, tooth, and restoration is essential when creating an aesthetically pleasing restoration. When restoring cervical lesions, the clinician must ensure gingival health through proper anatomical contours, marginal integrity, and surface texture. In addition, tooth preparation should consider the advantages of adhesive dentistry in terms of design and conservation of tooth structure.
In part 1 of this article, the selection of materials for restoring cervical lesions was discussed. In this article, a case report demonstrates a clinical protocol and technique for restoring a cervical defect.
CLINICAL PROCEDURE
 |
| Figure 1. A preoperative view of a cervical defect with a saucer-shaped, concave form lesion from a dislodged, pre-existing composite restoration with recurrent decay, plaque, and inflammation. |
The patient, a 38-year-old female, presented with sensitivity in the area of the maxillary right first bicuspid. The clinical examination revealed a saucer-shaped lesion in the cervical region as a result of the loss of a composite restoration with recurrent caries, plaque accumulation, and tissue inflammation (Figure 1). The occlusal surface revealed a wear pattern on the buccal cusp. After a review of the patients medical and dental history and consideration of all factors related to tooth substance loss (ie, erosion, attrition, abrasion, abfraction, or a combination of these processes), the differential diagnosis indicated an abfraction lesion associated with excessive occlusal loading and recurrent caries.
The abfraction cervical lesion typically has an irregular v or wedge shape. The shape of the lesion depends on the relative areas of compression and tension exerted by occlusal forces. If the cusp is placed into a state of tension, the resultant cervical defect is wedge- shaped. Conversely, if the cervical region is subjected to compressive stresses, the defect is more concave or saucer-shaped.1 As the teeth flex, the stresses at the cervical area cause a loss of tooth structure and/or restoration. Many of these patients present because of sensitivity to brushing and temperature changes and may require anesthesia during preparation. The operative procedure is only part of the restorative solution, and the underlying challenge of the occlusal disharmony should be resolved before or during the restorative procedure.
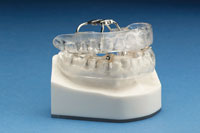
In this case, prior to operative treatment, the occlusal stops and excursive guiding planes were recorded with articulation paper. The occlusal surface revealed premature occlusal deflective contacts. Equilibration to eliminate the premature occlusal deflective contact was performed. Because of the occlusal wear and history of parafunctional habits, a dual-laminate acrylic occlusal guard was designed and fabricated with a flat plane of occlusion. This appliance allowed all teeth to contact evenly in all excursions without anterior disclusion.
Before administering anesthesia and placing the rubber dam for isolation, a selection of composite resins, tints, and modifiers with shade and orientation was recorded. Shade selection before rubber dam placement prevents improper color matching that may result from drying of the teeth (which elevates the value component of color). When teeth dehydrate, air replaces the water between the enamel rods, changing the refractive index and making the enamel more opaque and whiter than it would normally appear.2
Isolation and Preparation Design
Once anesthesia had been administered, the teeth were isolated with a rubber dam to achieve adequate field control and protect against contamination and moisture. A large hole was created to allow placement of the dam over the retainer.3,4 A caries-disclosing solution (Seek/SableSeek, Ultradent) was applied for identification of carious tissue and served as a guide for caries removal.5 The carious dentin was removed with a slow-speed carbide round bur No. 4 (Midwest) and spoon excavators.
 |
| Figure 2. Completed preparation. |
The outline of the preparation was only extended to include carious enamel, provide access to the carious dentin, remove residual staining, and provide access for the placement of restorative materials (Figure 2). The preparation design requires maximum preservation of remaining tooth structure because composite requires less volume to resist clinical fracture than gold foil or amalgam.6 The composite restoration not only provides strength to unsupported or weakened tooth structure, but also, because of its low thermal conductivity, it eliminates a potential cause of postoperative discomfort.7,8 To allow for better adaptation of the resin, all internal line angles should be rounded and the walls should be smooth. A chamfer line should be created at the cervical edge of the preparation. This chamfer preparation defines the finish line and allows a greater bulk of material to be placed at the restorative margin, which increases fracture resistance9 and reduces the stress at the tooth-restorative interface.10
 |
 |
| Figure 3. A chamfer was placed along the occlusal margin. | Figure 4. A scalloped bevel was placed in the enamel to interrupt the straight line of the chamfer and to reduce the potential for microleakage. |
To gain adequate access to the gingival margin, a nonmedicated retraction cord (Ultrapak No. 00, Ultradent) was placed using a curved instrument (TNCFIR/L, Hu-Friedy). To enhance the aesthetic result, a chamfer 0.3 mm in depth was placed along the occlusal margin with a long, tapered diamond (No. 6850, Brasseler USA, Figure 3). A scalloped bevel was developed 0.5 mm in the enamel in order to interrupt the straight line of the chamfer. The bevel is placed on all margins that are in enamel to increase the bonding surface area, reduce the potential for microleakage by exposing the ends of the enamel rods for etching, and improve blending of the resin with tooth structure11 (Figure 4). However, a butt joint should be prepared if the gingival margin is in cementum and/or dentin. Mechanical retention is not necessary. However, a slow-speed bur or air abrasion may be used to roughen the dentin surface to allow better resin penetration into the tubules.
Adhesive Protocol
The preparation was cleansed with a slurry of disinfectant and pumice (Consepsis, Ultradent). It was rinsed and lightly air-dried, and a self-etching adhesive (eg, iBond, Heraeus Kulzer; Clearfil SE Bond, Kuraray) was applied to the entire cavity surface with an applicator tip in 3 separate coats, slightly agitated for 30 seconds, lightly air-dried, then light-cured (eg, Translux CL, Heraeus Kulzer; Optilux 501, Kerr/Demetron) for 20 seconds. A study by Perdigao reported that commercial self-etch adhesives increased bond strengths on prepared enamel as compared to unprepared enamel. This study suggests that for all-in-one self-etch adhesives, preparation of enamel may be critical to achieve an optimal bond to enamel.12
Studies have demonstrated that the dental pulp possesses the potential for repair and can form reparative dentin bridges under certain restorative materials.13 However, the failure of composite restorations may be related to the sealing and adaptation at the tooth-restorative interface. Bacterial infiltration and microleakage are major contributing factors in the development of recurrent caries and pulpal inflammation.14 The use of nonadhesive restorative materials such as calcium hydroxide as a protective agent, however, may generate a gap at this interface, resulting in a colonization by bacteria and/or act as a hydraulic pump. The result is stimulation of the flow of tubular fluid inward, and this pressure may be responsible for postoperative sensitivity upon mastication.15
The hybridization of exposed dentin with an adhesive system is now considered the most effective way of protecting the dentin and pulp, helping prevent microleakage and assuring retention of the restoration, regardless of the depth of the preparation.16 A transitional zone of resin-reinforced dentin would be present between a cured resin and the unaltered dentinal substrate, forming a network with the collagen fibrils called the resin-dentin interdiffusion zone or hybrid layer.20 This acid-resistant layer forms a micromechanical bond to the dentinal tissue, which seals the dentin, preventing microleakage, secondary caries, and hypersensitivity.
The Cavity Liner
 |
 |
| Figures 5 and 6. A small amount of B-3 shaded flowable composite was injected on the axial wall with a syringe tip and uniformly distributed with an applicator. |
The use of a low-viscosity composite resin as a stress-absorbing lining material between the adhesive system and the restorative composite resin has previously been mentioned. Here, a small amount of shade B-3 flowable composite (Flowline, Heraeus Kulzer) was injected onto the axial wall with a syringe tip and uniformly distributed with an applicator (M-1, American Eagle, Figures 5 and 6). This technique reduces the possibility of trapping bubbles and ensures optimal adaptation of the resin material to the adhesive interface. An increment 0.5 to 1 mm in thickness was applied to the axial floor of the class V cavity preparation. Limiting the thickness of flowable composite to 0.5 to 1 mm or less will reduce shrinkage and improve marginal adaptation.17
The Artificial Dentin Layer
 |
| Figure 7. A B-3 shaded hybrid composite was applied to the occlusal one half of the preparation and contoured with a long-bladed composite instrument. |
The cavity preparation was filled incrementally with a shade B-3 hybrid composite (Venus, Heraeus Kulzer). The shade selection was based on the preoperative shade mapping diagram. The initial layer (the artificial dentin body consisting of 1 mm of dentin-shaded composite resin) was applied to the occlusal one half of the preparation and contoured with a long-bladed composite instrument (IPC-L [TN], American Eagle) to ensure adaptation to the underlying resin and tooth structure (Figure 7). Each layer was smoothed with a brush to prevent surface irregularities that could interfere with placement of the tints for internal characterization. Each increment was polymerized (eg, Translux CL, Heraeus Kulzer; Optilux 501, Kerr/Demetron) for 40 seconds, which allows placement of subsequent increments without deforming the underlying composite layer.
 |
| Figure 8. A second layer of hybrid composite was placed in the gingival half of the preparation and contoured. |
The second artificial dentin layer was placed in the gingival one half of the preparation, and the process was repeated (Figure 8). Dentin replacement materials were selected for strength and color, and the cores of these restorations were developed with the hybrid composite (Venus, Heraeus Kulzer). Since these small-particle hybrids and microhybrids (eg, Venus, Heraeus Kulzer; Point 4, Kerr; Vitalescence, Ultradent; Esthet-X, DENTSPLY Caulk) have refractive properties similar to dentin and a variety of shade options, they serve as excellent replacements for natural tooth structure.
Internal Characterization
 |
| Figure 9. To create an internal color within the restoration, a yellow and orange tint were combined and diluted with a clear, untinted resin and applied in a thin wash at the gingival area. |
To increase the chroma and create internal color in the restoration, a yellow and orange tint (Creactive Color Fluids, Heraeus Kulzer) were combined and diluted with a clear, untinted resin and applied in a thin wash at the gingival aspect. This was gradually faded out at the occlusal edge of the body layer. This approach provides a smooth, natural transition between the body and the cervical area of the tooth (Figure 9). If the chroma is too high, it can be diluted with an untinted resin applied with a small brush or removed with a clean applicator tip. The tint is polymerized for 40 seconds using the Translux light. This should occur before placing additional composite material. This will stabilize the characterization and prevent color mixing. The variation in color allows the development of a restoration with a 3-dimensional and natural appearance.18
The Artificial Enamel Layer
 |
 |
| Figures 10 and 11. A yellow translucent shaded hybrid composite was sculpted using the long-bladed composite instrument and smoothed with a sable brush. |
To allow space for both the proper thickness of enamel and a correct emergence profile, the final aesthetic result should be visualized during the development of the artificial dentin and internal characterization phases. To recreate the yellow translucency of enamel, the artificial enamel layer T-3 (Venus, Heraeus Kulzer) was used. The resin was rolled into a ball, placed at the cervical region of the tooth, and sculpted using a long-bladed composite instrument (TNCVIPC, Hu-Friedy). The resin was smoothed with a sable brush to obtain an anatomically correct emergence profile that encased the underlying matrix cervicoincisally and mesiodistally (Figures 10 and 11) and was polymerized for 40 seconds. The process of developing the restoration in increments and carefully shaping the composite resin before curing facilitates the establishment of anatomical morphology and minimizes the finishing protocol. This results in a restoration with improved physical and mechanical characteristics. One study indicated that a reduction in finishing was associated with a reduction in damage to the composite and improved clinical performance.19 After placing the last layer of composite and before the final cure, an oxygen inhibitor such as glycerin (Insure, Cosmedent, or De-OX, Ultradent) should be applied in a thin layer with a brush to the surface of the restoration. An additional polymerization for 2 minutes ensures complete polymerization of the composite resin at the margins.20
Finishing and Polishing
Restorative materials such as amalgam and gold require finishing and polishing procedures to refine anatomical morphology, contours, marginal integrity, and occlusion while enhancing surface smoothness. With more modern, tooth-colored materials, the overall objectives of finishing and polishing remain the same, with the added element of aesthetics. Today, the clinician strives to create aesthetic restorations that will maintain function and assure the structural integrity of the teeth.21 An optimal aesthetic restoration should (1) provide a smooth surface that will prevent plaque accumulation and resist stain, (2) possess ideal contours and emergence profile for improved tissue compatibility, (3) have a proper anatomical form for occlusal harmony, (4) display a shade that is in harmony with the surrounding dentition, (5) have well-adapted margins, and (6) function for a considerable length of time.22-24
The removal or trimming of composite resin can be achieved in 3 steps: contouring, fine finishing, and polishing. Contouring involves the gross reduction of the composite restoration to obtain the desired form and shape as determined by the parameters of function and aesthetics.25 Fine finishing comprises the delicate and precise finishing of the margins, removing surface defects and scratches, and developing a smooth surface.24 Polishing consists of reducing the roughness and scratches produced during the finishing procedure.26
In essence, the objective of the polishing procedure is to reduce the surface irregularities so that the distance between the scratches is less than the wavelength of visible light (approximately 0.5 um), which makes the surface as reflective as enamel.27 A surface appears smooth when it meets this criteria.28 These steps should be performed in sequence, progressing from the coarsest abrasive to the smoothest.29 The abrasiveness of one particle or material depends on its hardness.30 Hardness has been defined as the resistance to permanent indentation or penetration.26 In order for a composite finishing and polishing system to be effective, the cutting particles (abrasives) must be harder than the filler component of the composite.31 Accordingly, the effectiveness of the finishing and polishing process depends upon the type of composite resin.32-34
Newer composite formulations (small-particle hybrids and microhybrids) have modified the size, shape, orientation, and concentration of the filler material, improving physical and mechanical characteristics and allowing the resin composite to be polished to a higher degree.28 The variation in hardness between the inorganic filler and the matrix can result in surface roughness since these 2 components do not abrade uniformly.28,35 Accordingly, it is important that the surface gloss of the restorative material and tooth interface be similar because gloss can influence color perception and shade matching.36
 |
 |
| Figure 12. The anatomic contour was accomplished with 16- and 30-fluted, needle-shaped finishing burs. | Figure 13. The gingival areas were contoured and finished with 16- and 30-fluted, short, tapered, straight-edge finishing burs. |
In this case, the initial contouring was performed with a series of finishing burs. For finishing the buccal surface, a long, needle-shaped finishing bur allows the proper anatomical contours of the buccal aspect of the posterior tooth to be developed. To replicate natural form and texture, 16- and 30-fluted, needle-shaped finishing burs (ET-6, Brasseler USA) were used dry with light pressure to prevent heat buildup (Figure 12). This dry finishing allows the clinician to visualize the margins and contours along with the adjacent tooth. A smooth surface can be achieved by sequentially increasing the number of flutes. The gingival contouring was accomplished with a short, tapered, straight-edge finishing bur (ET-3, Brasseler USA), which conforms to the straight emergence profile (as the tooth emerges from the gingival sulcus, Figure 13). It is important to use the burs without irrigation and to retract the gingiva with an 8A instrument, closely observing tooth structure and the gingival margin. To avoid excessive heat generation, an intermittent staccato motion with light pressure should be applied at conventional speed. It is imperative not to ditch or scar the root surface (cementum) at the gingival margin. The ET series finishing bur is designed with a round tip, which minimizes the possibility of scarring or gouging the root surfaces when finishing gingival regions.
 |
| Figures 14 and 15. Final polishing was accomplished with rubber points and cups. |
 |
| Figures 15. |
 |
| Figure 16. To impart a high luster, a loose abrasive polishing paste was applied at conventional speed with a synthetic foam cup. |
After the initial finishing procedure, the margins and surface defects were sealed. The restoration and all margins were re-etched for 15 seconds with a 35% orthophosphoric acid (Gluma Etch 35, Heraeus Kulzer), rinsed for 5 seconds, and dried. A layer of composite surface sealant (OptiGuard, Kerr/Sybron) was applied over the margins and the restoration. This will prevent leakage and seal any microfractures or microscopic porosities in the material that may have formed during the finishing procedures. The use of a surface sealant has been shown to reduce the wear rate of posterior composite resins,37 improve resistance to interfacial staining,38 and decrease microleakage around class V composite resins.38 Any excess resin can be removed with a No. 12 scalpel, and the retraction cord is removed to inspect for overhangs.
Fine finishing of the buccal and gingival region can be performed with prepolish and high-shine rubber points and rubber hollow cups (Diacomp, Brasseler USA). These are composed of aluminum oxide particles and silicone that permit surface defects to be eliminated effectively (Figures 14 and 15). The impregnated cup follows the contour of the gingival neck and reaches into the sulcus to smoothe rough areas. To impart a high luster or surface reflectivity on the tooth and restoration while maintaining the existing texture and surface anatomy, the final polishing can be accomplished with loose abrasive polishing paste and a synthetic foam cup (Enhance cup, DENTSPLY) applied at conventional speed (Figure 16). These loose abrasive pastes contain aluminum oxide or diamond particles dispersed in a water-soluble vehicle such as glycerin. They allow the anatomical details to be maintained while imparting an enamel-like appearance to the restored tooth. The incremental use of water with these aluminum oxide abrasives enhances their effectiveness. Diamond abrasive pastes should be used and kept dry because the effectiveness decreases when diluted with water or saliva. Examples of loose abrasives with aluminum oxide particles include Prisma-Gloss/Prisma-Gloss ExtraFine (DENTSPLY Caulk); CompoSite (Shofu); Enamelize (Cosmedent); and Diamond Polish (Ultradent). Examples of loose abrasives with diamond particles include Diamond Polish (Ultradent) and Diamond Polishing Paste (Kerr/Sybron). Although clinical evidence of the polishability of these new, small-particle hybrids appears promising, the long-term durability of the polish will need to be evaluated in future clinical trials.
 |
| Figure 17. The completed restoration. |
The postoperative result achieved with the use of direct composite resin in this rehabilitation of the dento-gingival complex depends on the proper selection of restorative materials, meticulous use of restorative adhesive concepts (adhesive preparation design and selective bonding protocol), consideration and management of the occlusion, and a methodical finishing and polishing procedure (Figure 17).
CONCLUSION
The differing physical and mechanical properties of newer restorative materials require a protocol that is different from that of earlier restorative materials. The dentist must have knowledge of the restorative materials, color concepts, internal structure of teeth, and preparation design. This knowledge must be integrated with the unique set of circumstances that define each clinical situation.
References
1. Grippo JO. Abfractions: a new classification of hard tissue lesions of teeth. J Esthet Dent. 1991;3:14-19.
2. Winter R. Visualizing the natural dentition. J Esthet Dent. 1993;5:102-117.
3. Croll TP. Alternative methods for use of the rubber dam. Quintessence Int. 1985;16:387-392.
4. Liebenberg WH. General field isolation and the cementation of indirect restorations: Part 1. J Dent Assoc S Afr. 1994;49:349-353.
5. Kidd EA, Joyston-Bechal S, Beighton D. The use of a caries detector dye during cavity preparation: a microbiological assessment. Br Dent J. 1993;174:245-248.
6. Leinfelder KF. A conservative approach to placing posterior composite resin restorations. J Am Dent Assoc. 1996;127:743-748.
7. Baratieri LN, Ritter AV, Perdigao J, et al. Direct posterior composite resin restorations: current concepts for the technique. Pract Periodontics Aesthet Dent. 1998;10:875-886.
8. Degrange M, Roulet J-F, eds. Minimally Invasive Restorations With Bonding. Carol Stream, Ill: Quintessence Pub Co; 1997.
9. Bichacho N. Direct composite resin restorations of the anterior single tooth: clinical implications and practical applications. Compend Contin Educ Dent. 1996;17:796-802.
10. Leinfelder KF. Restoration of abfracted lesions. Compendium. 1994;15:1396-1400.
11. Strassler HE. Esthetic posterior restorations: direct composite resins. J Esthet Dent. 1992;4:216-220.
12. Perdigao J, Geraldeli S. Bonding characteristics of self-etching adhesives to intact versus prepared enamel. J Esthet Restor Dent. 2003;15:32-42.
13. Cox CF, Bergenholtz G, Heys DR, et al. Pulp capping of dental pulp mechanically exposed to oral microflora: a 1-2 year observation of wound healing in the monkey. J Oral Pathol. 1985;14:156-168.
14. Bergenholtz G, Cox CF, Loesche WJ, et al. Bacterial leakage around dental restorations: its effect on the dental pulp. J Oral Pathol. 1982;11:439-450.
15. Brünnsrm M. Sensitivity of dentine. Oral Surg Oral Med Oral Pathol. 1966;21:517-526.
16. Van Meerbeek B, Perdigao J, Lambrechts P, et al. The clinical performance of adhesives. J Dent. 1998;26:1-20.
17. Eakle WS, Ito RK. Effect of insertion technique on microleakage in mesio-occlusodistal composite resin restorations. Quintessence Int. 1990;21:369-374.
18. Vanini L, De Simone F, Tammaro S. Indirect composite restorations in the anterior region: a predictable technique for complex cases. Pract Periodontics Aesthet Dent. 1997;9:795-804.
19. Duke ES. Direct posterior composites. J Indiana Dent Assoc. 1993;72:35-39.
20. Sturdevant CM, Roberson TM, Heymann HO, et al. The Art and Science of Operative Dentistry. 3rd ed. St Louis, Mo: Mosby; 1995:592.
21. Touati B. Bonded ceramic restorations: achieving predictability. Pract Periodontics Aesthet Dent. 1995;7:33-37.
22. Goldstein RE. Finishing of composites and laminates. Dent Clin North Am. 1989;33:305-318.
23. Yap AU, Ang HQ, Chong KC. Influence of finishing time on marginal sealing ability of new generation composite bonding systems. J Oral Rehabil. 1998;25:871-876.
24. Jefferies SR. The art and science of abrasive finishing and polishing in restorative dentistry. Dent Clin North Am. 1998;42:613-627.
25. Lutz F, Setcos JC, Phillips RW. New finishing instruments for composite resins. J Am Dent Assoc. 1983;107:575-580.
26. Yap AU, Sau CW, Lye KW. Effects of finishing/polishing time on surface characteristics of tooth-coloured restoratives. J Oral Rehabil. 1998;25:456-461.
27. Van Noort R. Controversial aspects of composite resin restorative materials. Br Dent J. 1983;155:380-385.
28. Chung KH. Effects of finishing and polishing procedures on the surface texture of resin composites. Dent Mater