


INTRODUCTION
We live in a society where our appearance plays a major role in our ability to succeed. A beautiful and healthy smile can make a measurable difference in our self-confidence and self-esteem. However, what people are born with is difficult, if not impossible, to re-create once destroyed. In other words, it is difficult to reproduce nature with the unnatural. Man-made materials in dentistry have not been scientifically proven to exceed the capabilities of a natural dentition until now. With the advent of minimally invasive dentistry and prepless procedures, we are now able to simulate nature functionally and aesthetically with bonded glass, lithium disilicate, and zirconia restorations. We describe these procedures as biomimetically driven restorations (BDR).1 I can say that BDR in my practice has given me a recharged passion for my craft. With 35 years of practice behind me, I am more excited than ever with the “less-is-more” concept.
Magne2 and Magne and Belser3,4 define BDRs in their articles, which I sum up in 3 statements:
1. Having a strong respect for nature and proceeding as conservatively as possible to preserve healthy oral tissues.
2. Maintaining state-of-the-art education and current scientifically based protocols for adhesive dentistry.
3. Using care, skill, judgment, and communicating with integrity to serve our patients and our profession.
The following case is biomimetically driven and is delivered with care, skill, judgment, integrity, enthusiasm, and love (Figures 1 and 2).
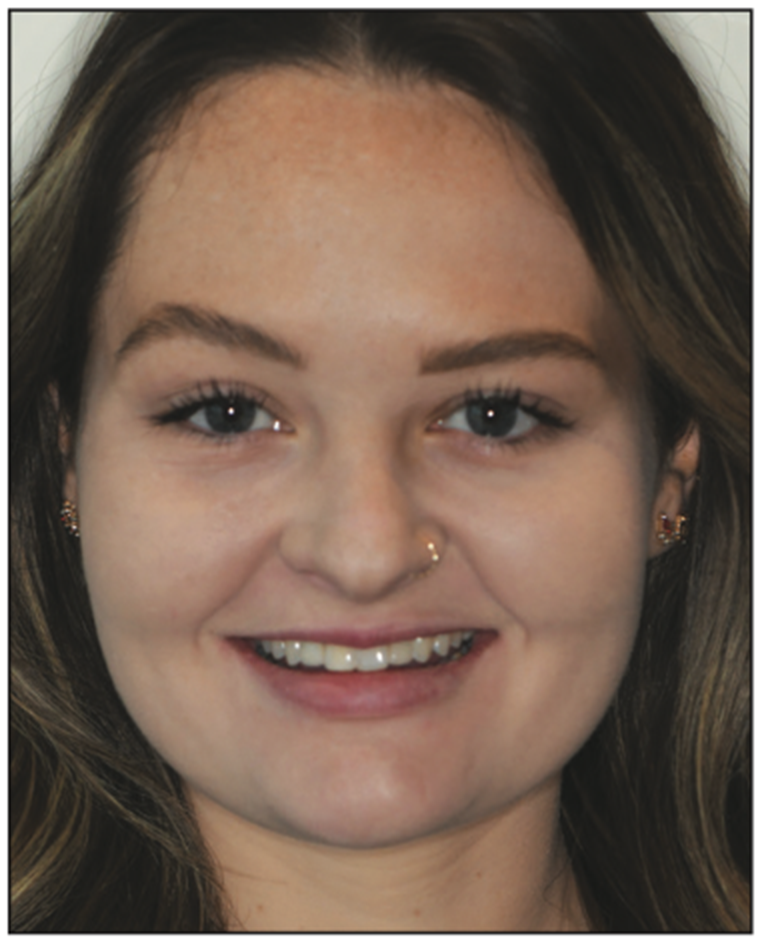
Figure 1. Preoperative full-face view.
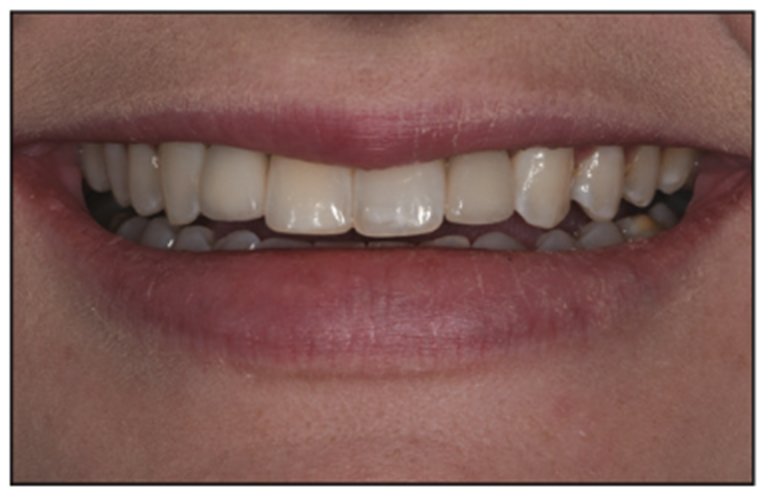
Figure 2. Pre-op smile view.
CASE REPORT
My stepdaughter is a 25-year-old who presents with a Class III skeletal classification (Figure 3). From an early age, she was all too familiar with the dentist as she was missing her permanent lateral incisors. Through orthodontics and close supervision, all providers did their best to mitigate the futuristic need for orthognathic surgery. Early on in growth and development, a decision was made to guide the permanent cuspids into their usual positions, leaving room for implants to be placed in the future. At age 18, Ellen was entering college, and implants were able to be placed to restore the missing teeth. She was done with dentistry for a while! Fast-forward 7 years to today. I had an “aha!” moment for my sweet Ellen’s future smile. With the advent of prepless veneers and the most current bonding techniques, biomimetically driven restorations would give Ellen the smile she deserved and one that I could truly be proud of.
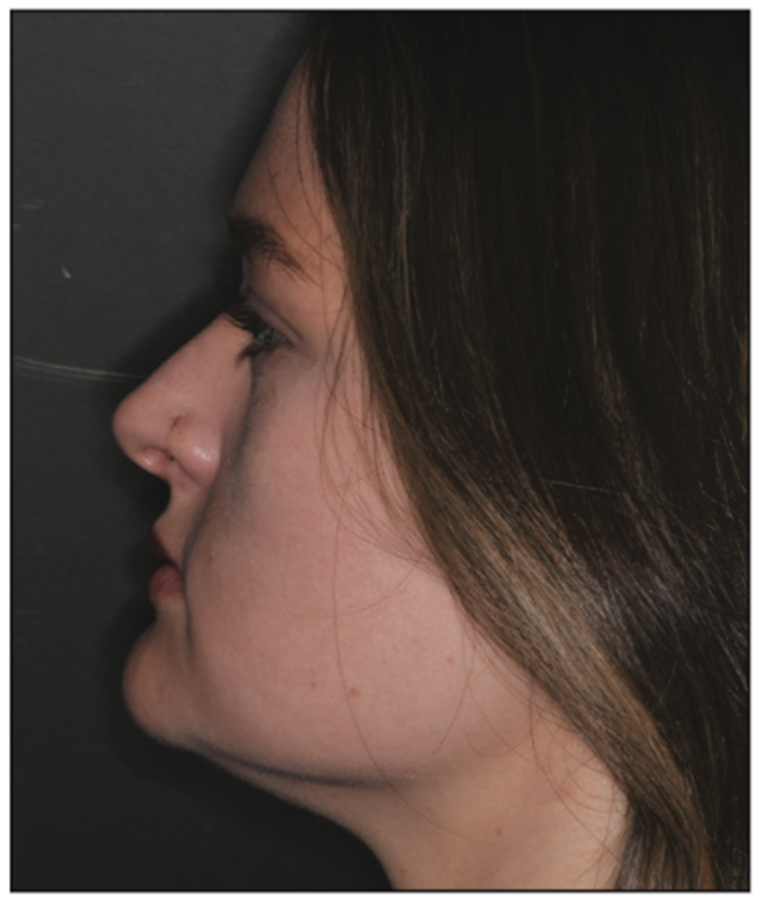
Figure 3. Pre-op skeletal Class III profile.
Ellen’s short upper lip length (average upper lip length is 19 to 22 mm) (Figure 4)5 and upper incisor tooth size (average central incisor crown height is 9.5 to 11.5 mm) (Figure 5), as well as limited visibility of tooth structure in repose, were all positive when considering the option of additive dentistry. The thought of an increased VDO would additionally aid in compensating and masking the Class III facial profile.
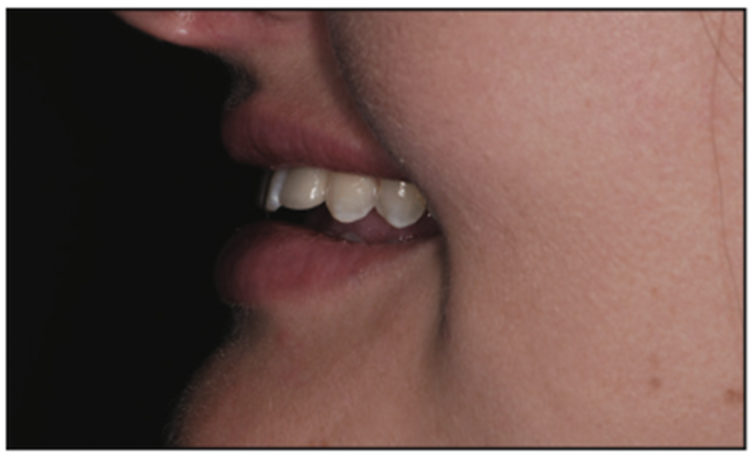
Figure 4. Short upper lip.
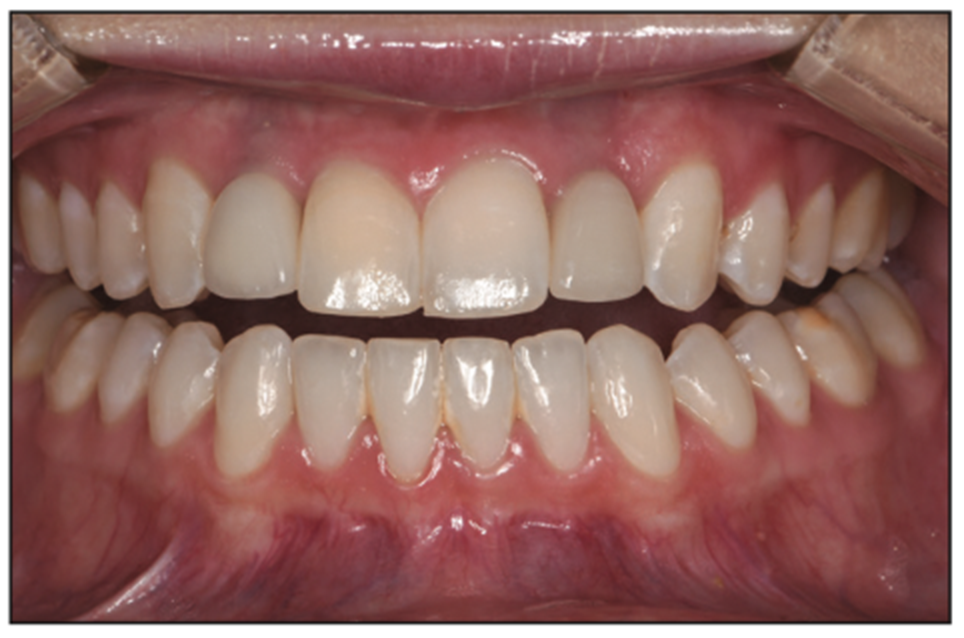
Figure 5. Pre-op retracted view.
Where to begin? Start with the end in mind.
1. Establish the location of the upper teeth in the face (maxillary incisal edge position)
2. Establishing home base: Confirm the TMJ’s home base with a Kois deprogrammer6
3. Take jaw measurements to transfer to an articulator, and complete the wax-up
4. Try in the wax-up
5. Trial smile
6. Final restorations
7. Protect the investment with a nightguard as needed
Maxillary Incisal Edge Position
Adding simple wax to the upper centrals and cuspids allows us to establish a desired anterior tooth length. One to 2 mm of visibility is desired for maxillary central incisors in repose and zero display of maxillary cuspids.7 A normal range for tooth visibility in an average smile is 6 to 10 mm, which is adjusted based on lip mobility. Evaluation of Ellen’s smile revealed that an additional 3 mm could be added to the centrals and 2 mm to the cuspids. Similarly, the Golden Shimbashi is a golden rule of proportion used to assess the VDO. It was developed by Dr. Henry “Hank” Shimbashi from Edmonton, Alberta. His study revealed an average measurement existed from the gingival zenith of the upper central incisor to the gingival zenith of the lower central incisor. Average measurements range from 19 to 22 mm. A similar measurement can be taken from a lateral cephalometric tracing measuring the distance from the anterior nasal spine to the menton.8
Establishing Home Base
Confirming the bilateral joint position for long-term stability of our case was achieved with a Kois deprogrammer. After 3 weeks of 24/7 wear, the patient returned to the clinic to assess the appliance, TMJ symptoms, her comfort level, and, the consistent and precise position of the lower front tooth on the upper platform of the deprogrammer. The patient stated that she was quite comfortable with the appliance in place and felt less TMJ tension and muscle discomfort. A precise wear “spot” on the platform of the deprogrammer confirmed joint stability in this position (Figure 6). Next was building the teeth to the same home base. We had already established where to put the incisal edges of the centrals and the cuspids as well as the A-P position of the jaw through steps 1 and 2. Now it was time to complete the puzzle.

Figure 6. Kois deprogrammer.
Jaw Measurements and Diagnostic Wax-up
Jaw measurements are taken using a Kois disposable index tray (Panadent) (Figure 7).9-11 This bite registration on the Kois platform transfers the planes of occlusion and joint position to an articulator (Panadent). The laboratory team can then complete a diagnostic wax-up (analog or digital) to the planes of the face and the trajectory of the joint predictably. Golden Rules were followed for tooth positioning and smile design for this young woman.12,13
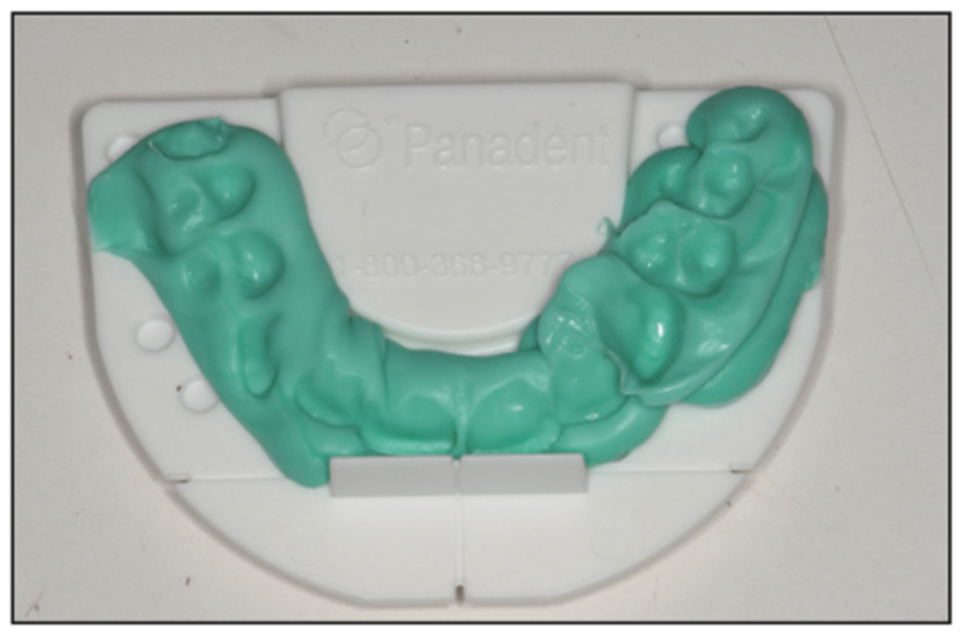
Figure 7. Panadent facial plane analyzer.
Trial Smile
There are multiple ways to try on a smile: digitally, from the wax-up, or by hand-sculpting composite directly on the patient’s teeth. The most predictable method certainly is using a putty matrix from the wax-up, which followed the prescribed and desired proportions (Figure 8).14 This try-in accomplishes confirmation from the patient as to the goals of the smile as well as confirmation for the dentist of jaw measurement and facial plane accuracy. It is much simpler to correct a plane of occlusion error or an A-P positioning error before restoring begins.

Figure 8. Trial smile using putty matrix.
The Restorations
Now for the final 2 steps: the upper and the lower restorations. With BDR and prepless dentistry, it is often possible to forgo provisionalization. For this reason, the wax try-in functions as a test drive and is a very important step that is not to be taken lightly or forgotten.
For this patient, care was taken in the wax try-in. However, provisionals were only needed for the 2 upper centrals that were previously bonded.
Sharp line angles of the upper teeth were removed, impression copings for implants were placed, retraction after anesthesia was done, and final impressions were taken (Panasil heavy and x-light body, Kettenbach LP).
Upon delivery of the uppers, anesthesia is an always. Retraction was placed to minimize sulcular fluid contamination, and in the cases where oral hygiene is inadequate, it can control bleeding (size 000 regular Ultrapak Cord [Ultradent Products]]). The infinity margin of these fine restorations may have resin overflow, which may require micro-finishing for biologic tissue health. This author uses a 14-fluted carbide to finesse margins (Carbide #7901 [Optimum]) and polishing wheels on lingual surfaces to polish as needed (FLW14C.RA Dialite Feather Lite [Brasseler USA]) as well as a 12 blade, all under loop magnification. Abutments over the implants are torqued into place, and crowns are cemented (RelyX Unicem [3M]).
From the information gathered through the Kois deprogrammer, resin overlays for lower posteriors were fabricated to transfer the bite from the articulator back to the mouth (Figures 9 to 14). These restorations can be used as long-term interim restorations when bonded in place in cases where finances are a consideration or predictable jaw position is questionable.
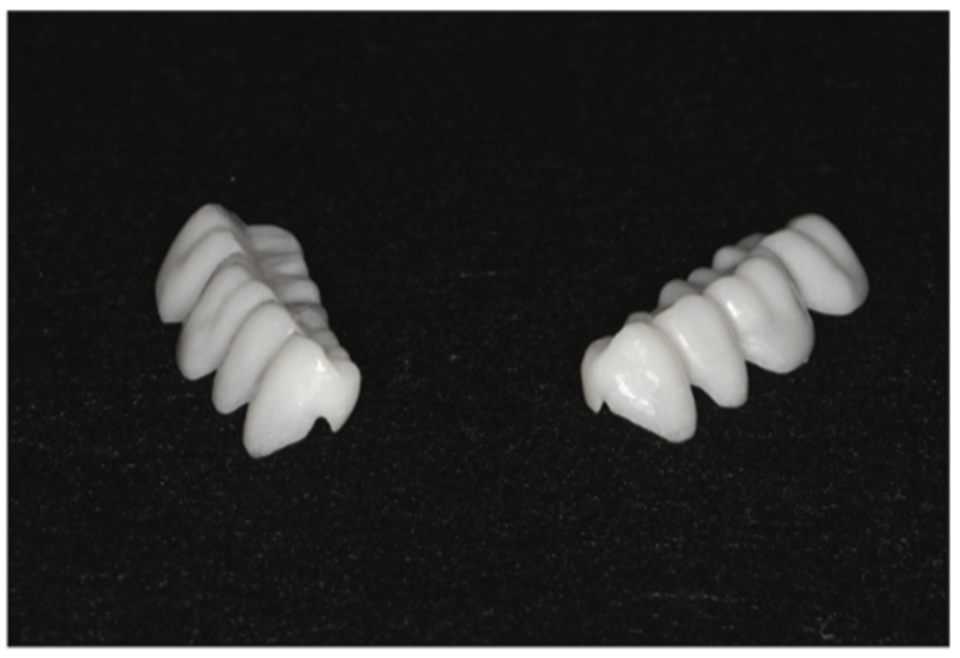
Figure 9. Provisional overlays.
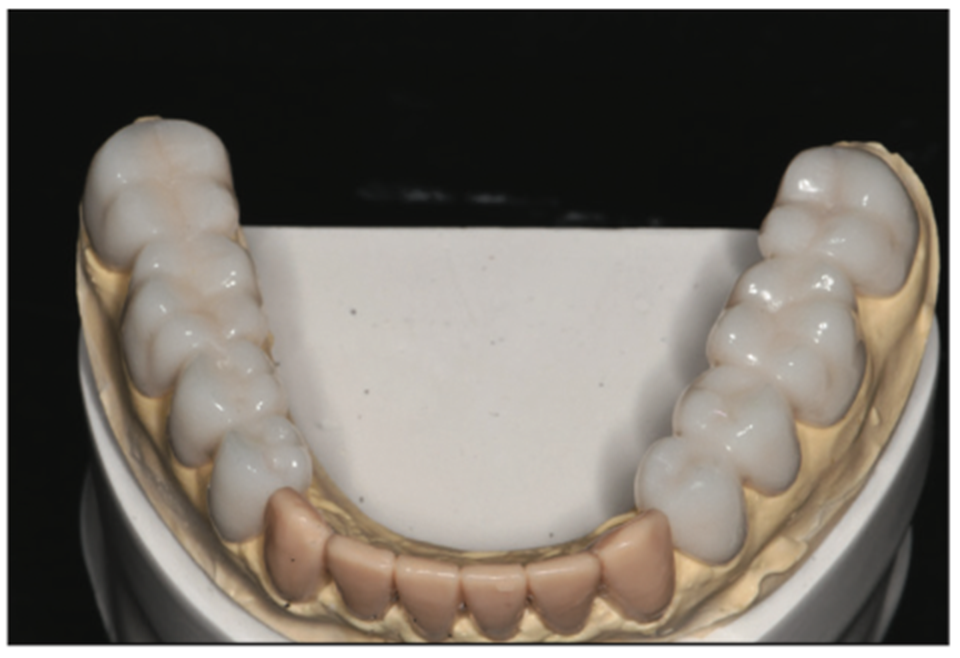
Figure 10. Provisional overlays on model.
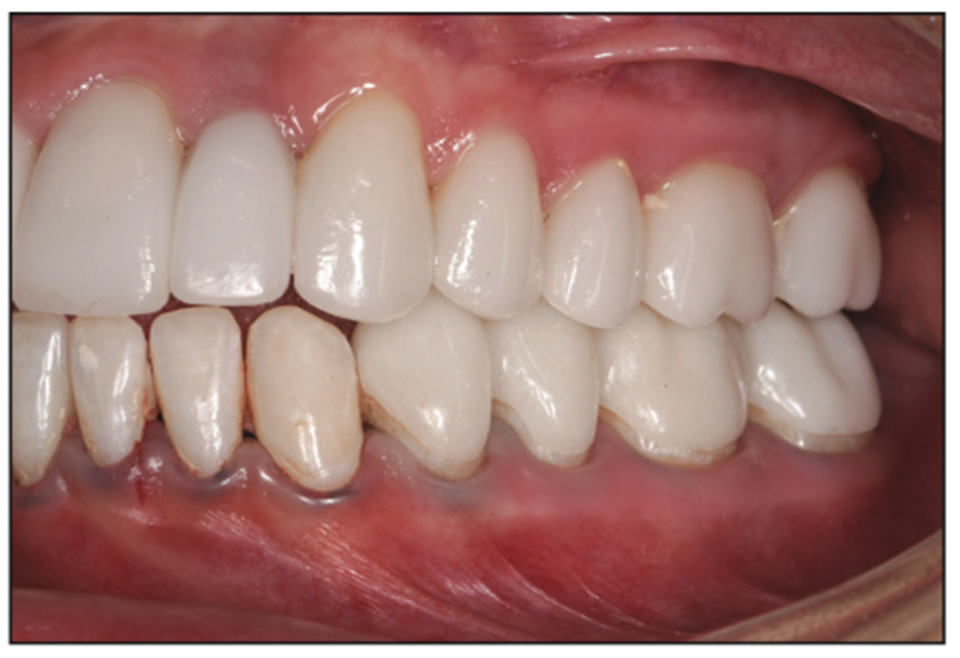
Figure 11. Lower left provisional overlays.
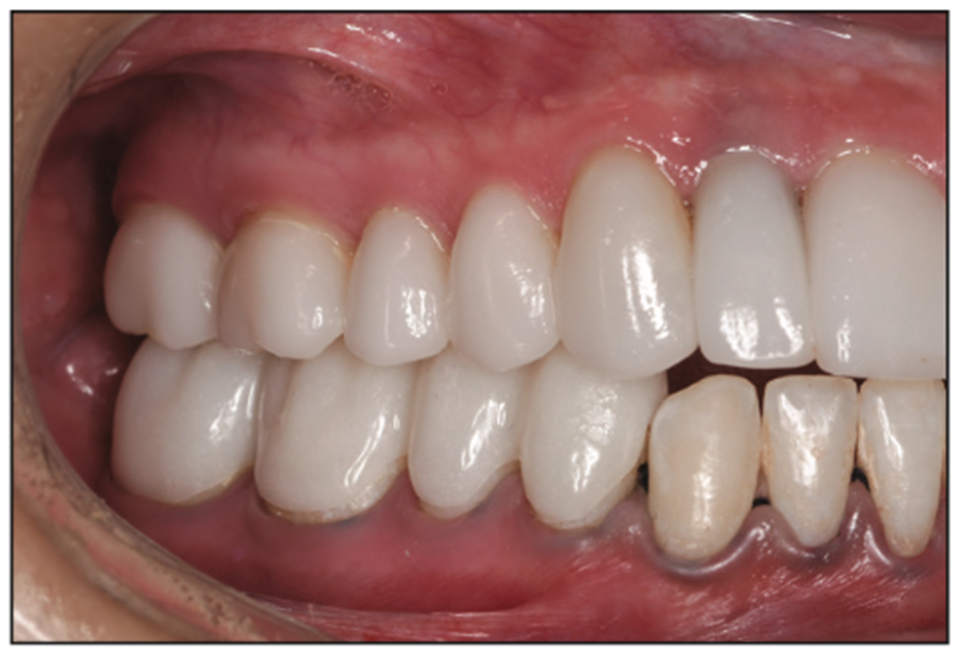
Figure 12. Lower right provisional overlays.
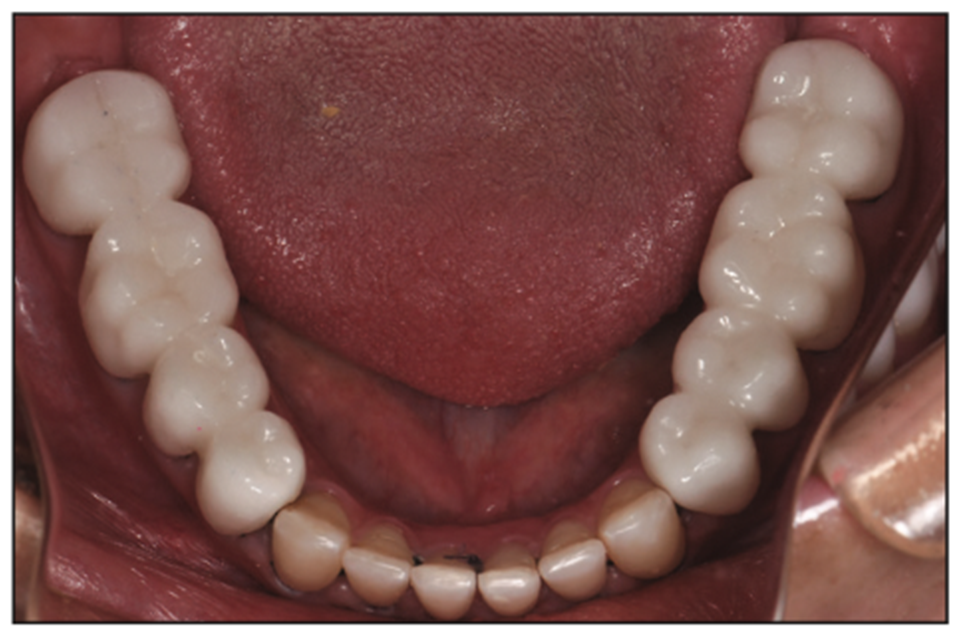
Figure 13. Lower arch with provisional overlays in place.
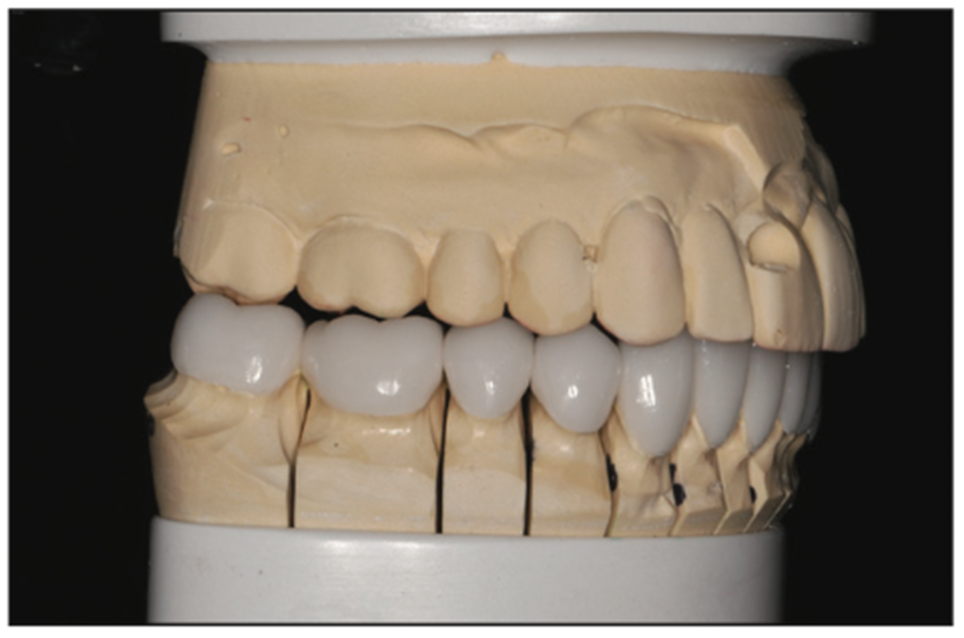
Figure 14. Lower restorations on model.
In this case, the posterior overlays were used to confirm the jaw position and aided in cross-checking precision tooth position and jaw position. Lower impressions were taken (Panasil heavy and x-lite body, Kettenbach LP) after sharp line angles were removed with a diamond bur on a high-speed handpiece. The patient left without provisionals.
Upon return, as was done in the upper arch, anesthesia was obtained and lower restorations were tried in with try-in paste (Rely-X try-in paste, shade translucent [3M]) to confirm color, fit, and occlusion (Figure 15). A patient approval and signature were recorded to proceed with final cementation.
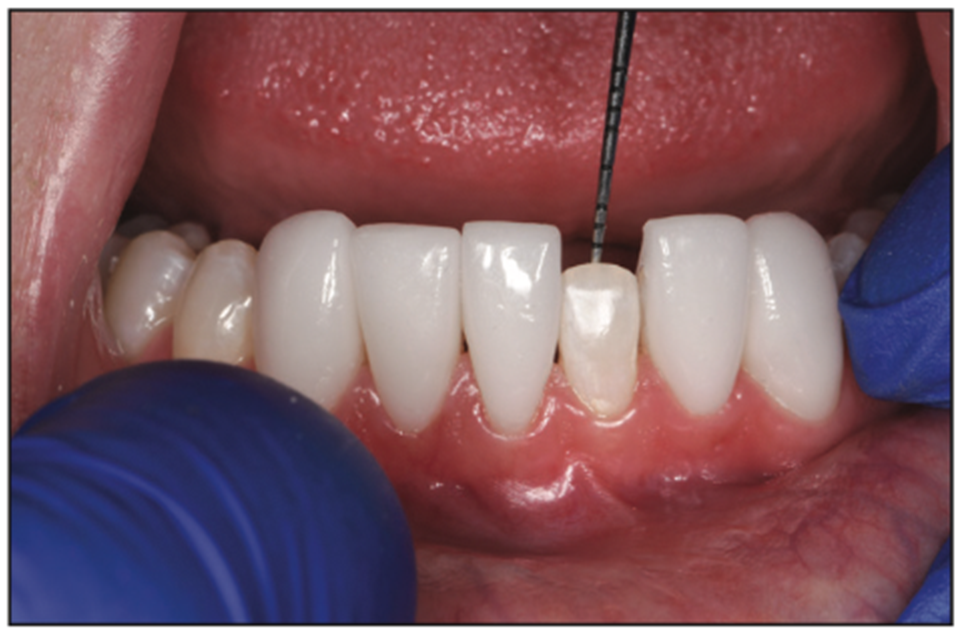
Figure 15. Lower anterior try-in.
Retraction was placed (Ultrapak Cord size 000 regular), and all porcelains were cleaned (Ivoclean cleaning paste [Ivoclar Vivadent]) and primed (ALL-BOND UNIVERSAL light-cured dental adhesive [BISCO Dental Products]). Teeth were micro-etched (PrepStart MicroEtcher [Zest Dental Solutions]) (Figure 16), and the lower anterior 6 veneers were bonded into place (RelyX Veneer Cement, shade translucent [3M]). Occlusion was verified and finessed to bilateral, simultaneous contact of the cuspids (Figure 17). The 4 incisors were modified as needed to accommodate shimstock pass-through, allowing minimal friction in the chewing cycle (Shimstock Foil Strip, 12 μm [Almore International]).
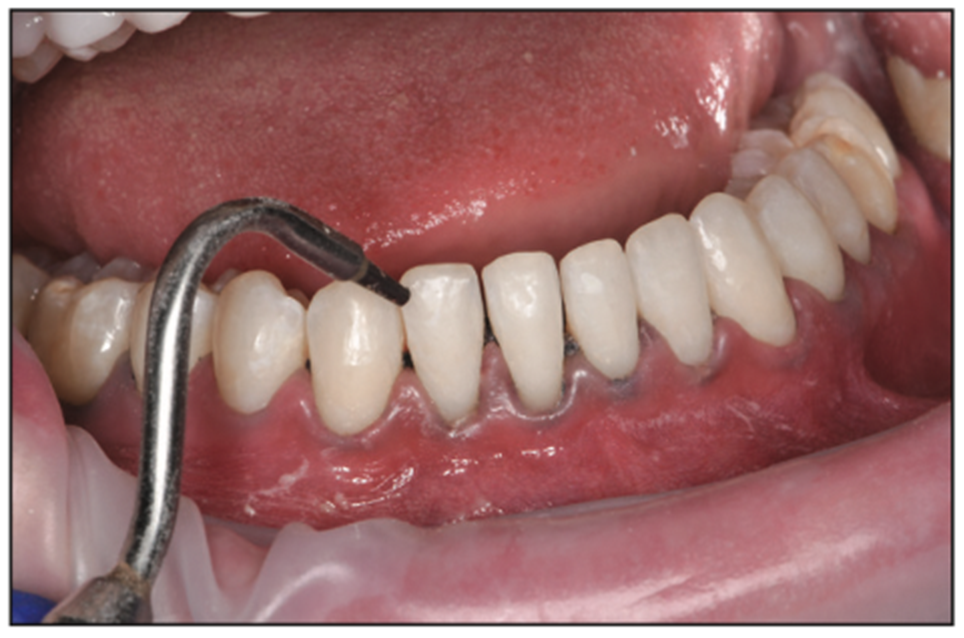
Figure 16. Micro-etched natural teeth.
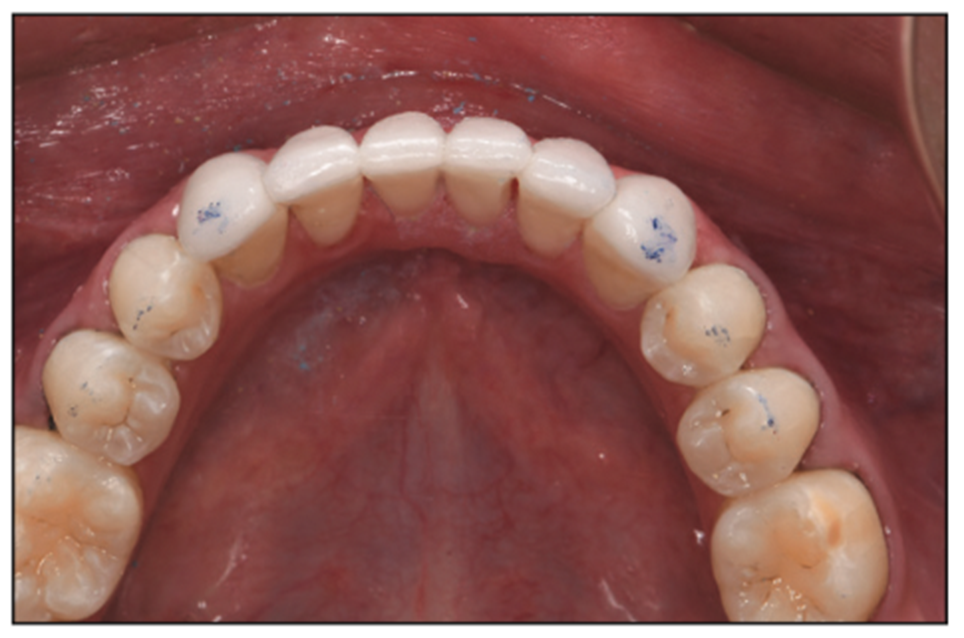
Figure 17. Lower 6 anteriors bonded, and occlusion adjusted.
Next, proceeding bilaterally tooth by tooth, I began with the first premolars (Figure 18) and finessed the occlusion to achieve the same bilateral simultaneous contact with equal intensity all the way back to the molars with anteriors clearing shimstock and all posteriors holding shimstock (Figures 19 and 20).Margins were finessed and polished, contacts were cleared with floss, and retraction was removed. Final radiographs were taken to confirm thorough cement removal, and impressions were taken for a nighttime appliance to protect our investment, if needed (Silginat [Kettenbach LP] ).
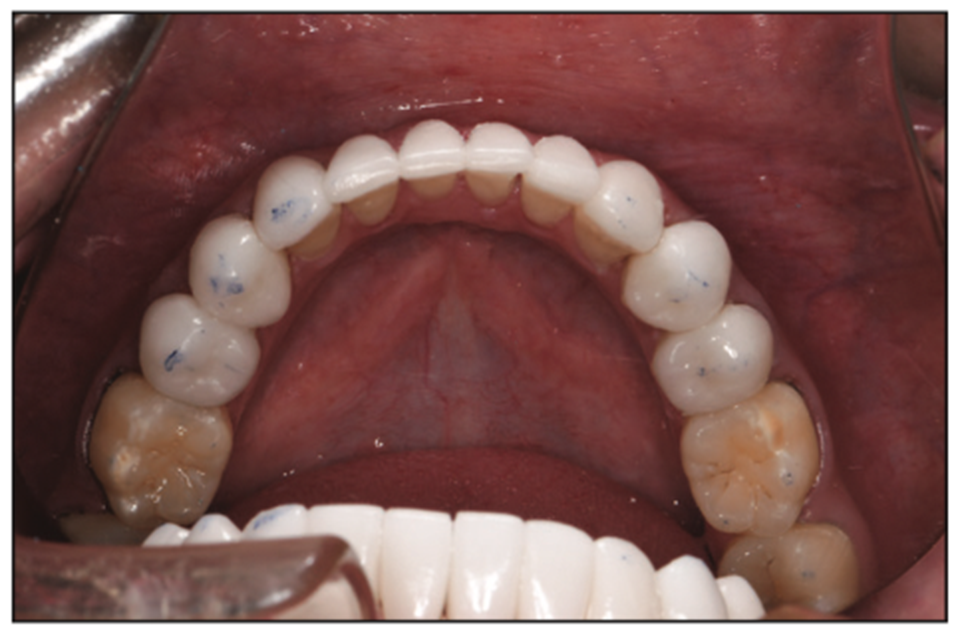
Figure 18. Occlusion finessed.
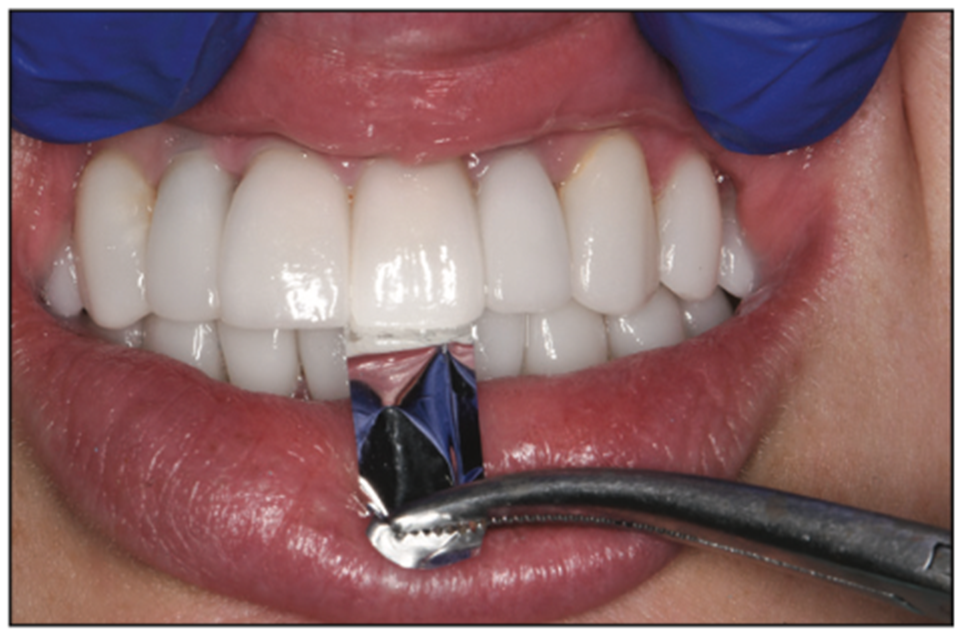
Figure 19. Anterior incisors do not hold shimstock.
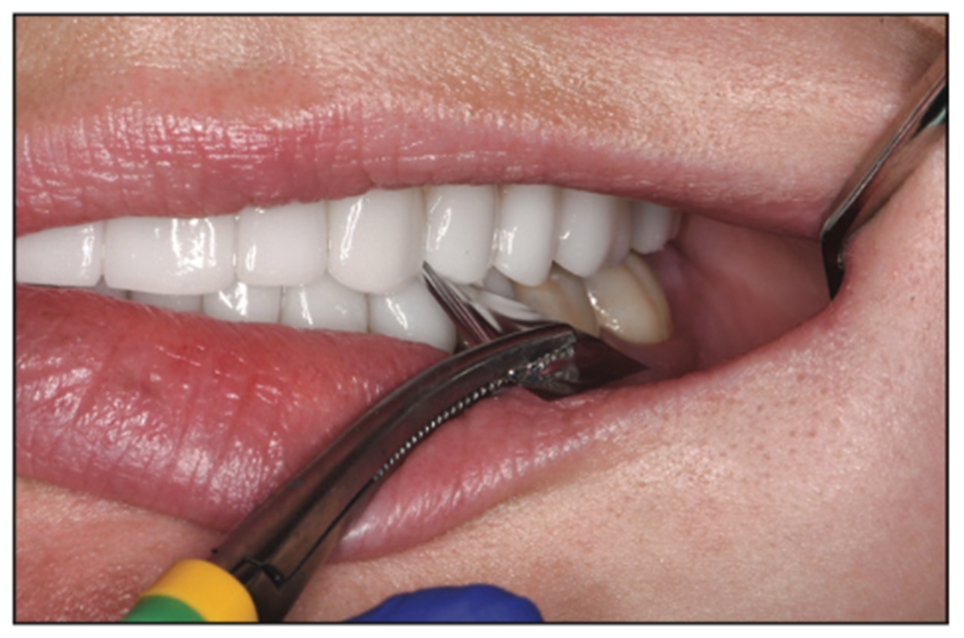
Figure 20. Cuspids, pre-molars, and molars all hold shimstock.
CONCLUSION
In conclusion, I can sleep well at night with these minimal prep veneers, knowing my family of patients is bonded with the strongest tooth-to-substrate bond possible: enamel bonding. These BDRs offer the finest in aesthetics, health, function, and longevity our profession has to offer (Figures 21 to 26).
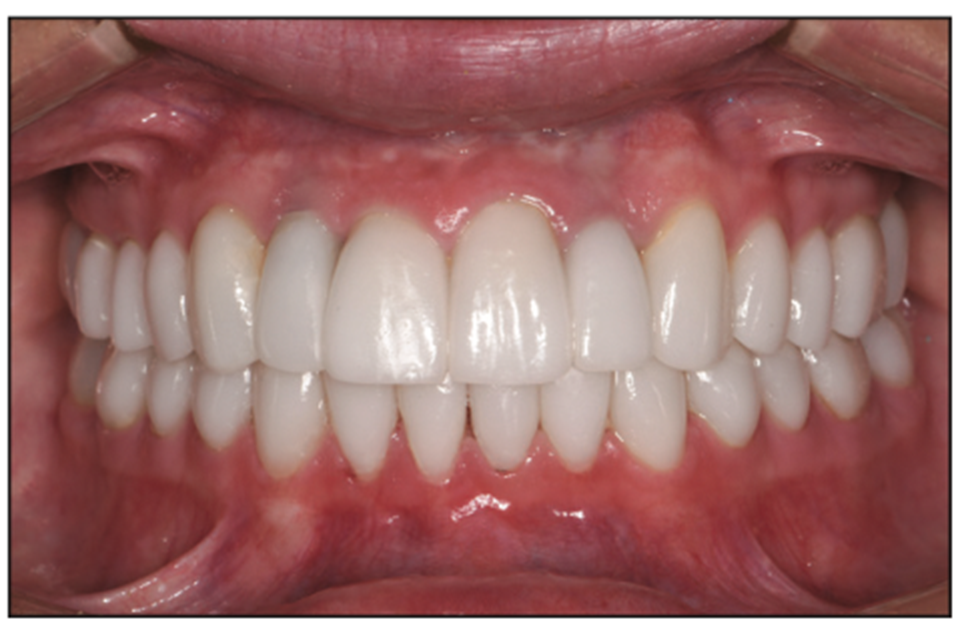
Figure 21. Postoperative retracted view.

Figure 22. Before and after smile.
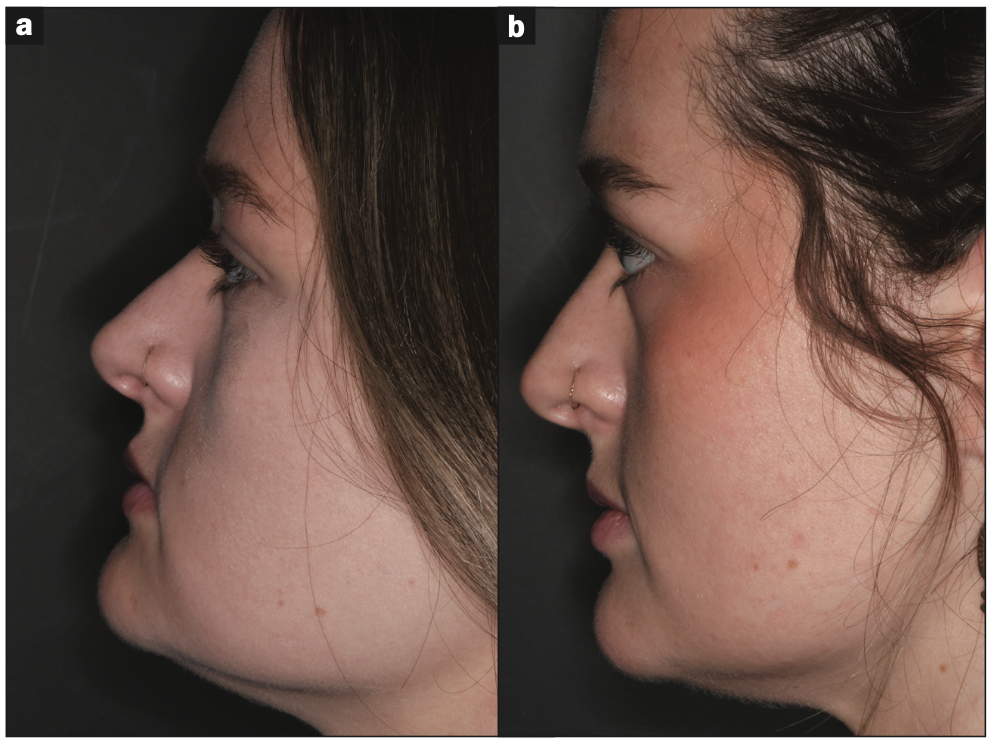
Figure 23. Before and after profile.

Figure 24. Before and after uppers.
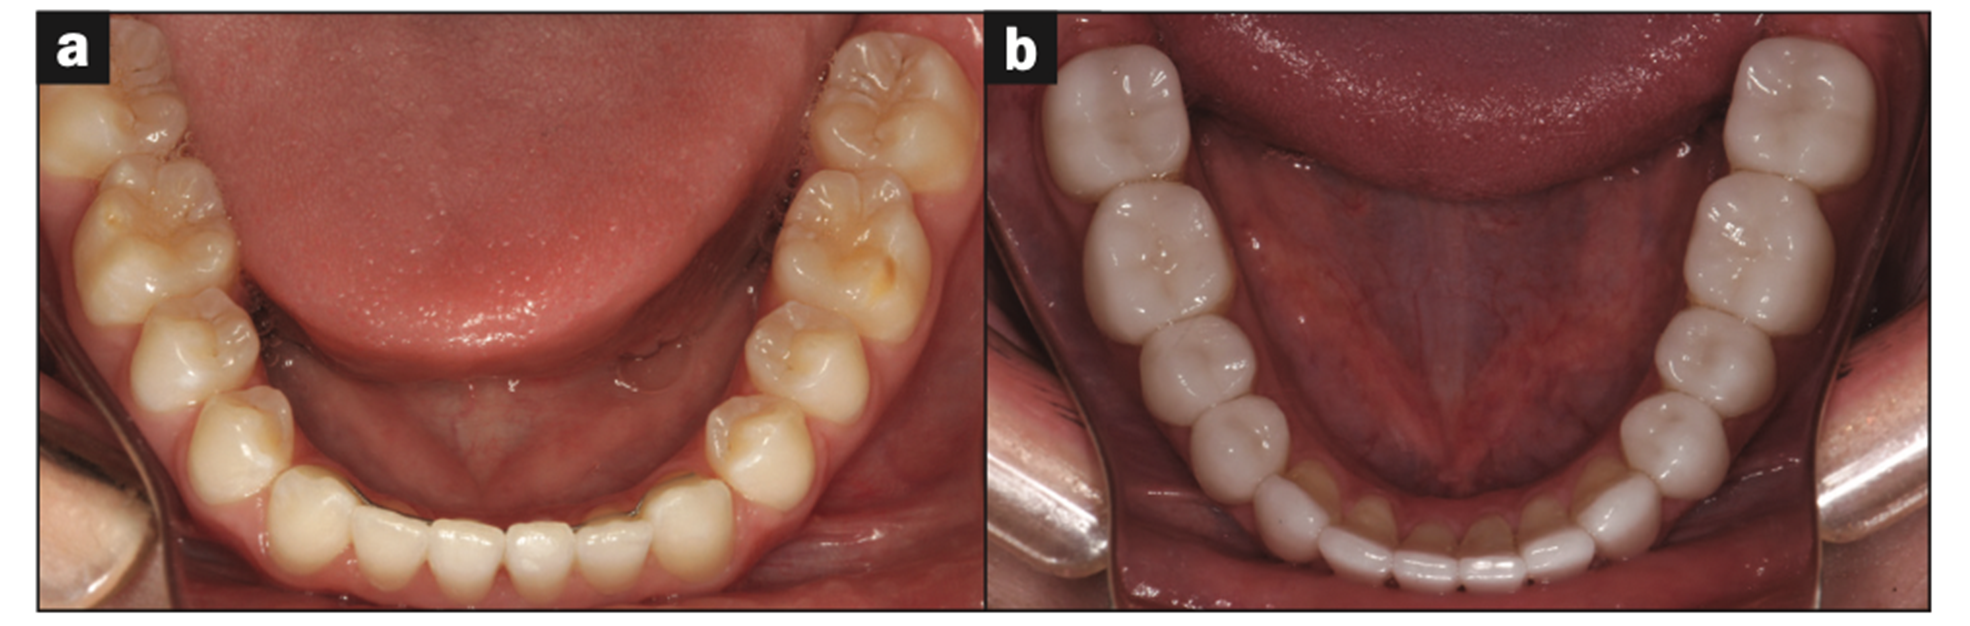
Figure 25. Before and after lowers.
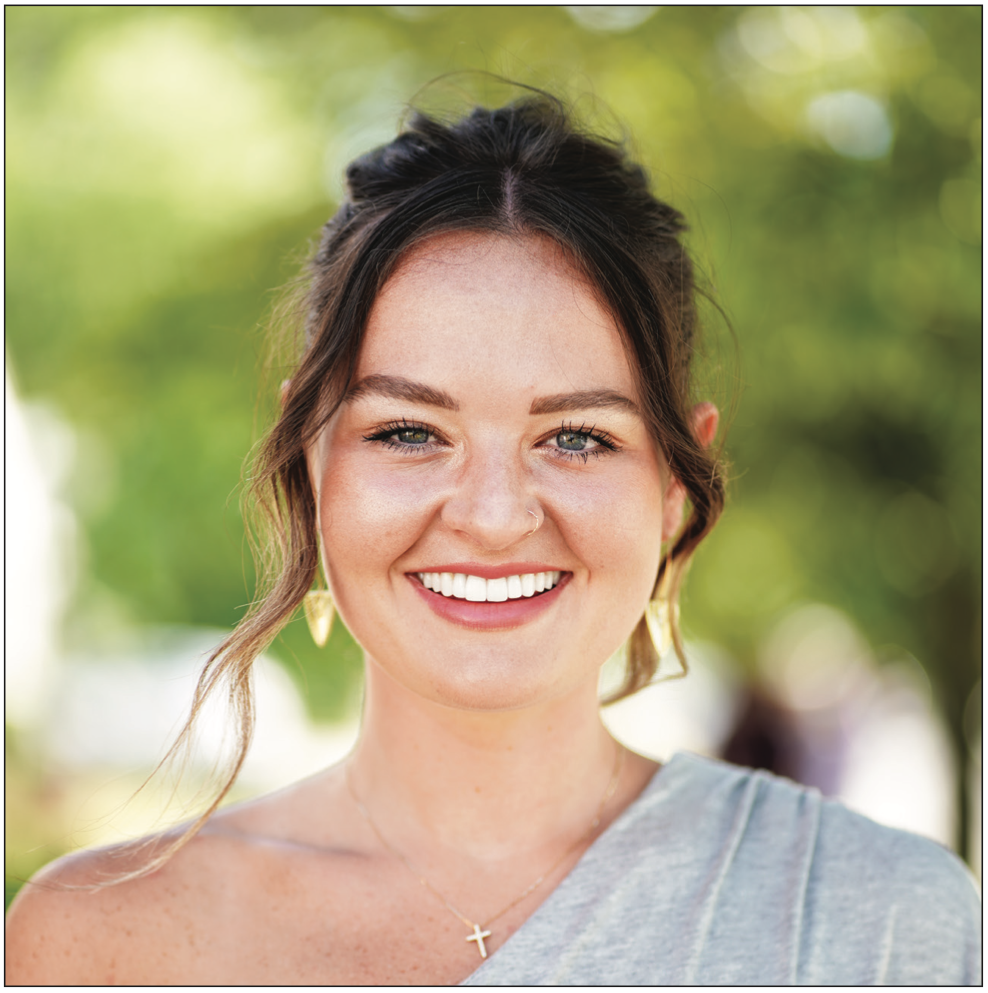
Figure 26. Glamour smile.
ACKNOWLEDGEMENT
I wish to thank my laboratory technician, Mark Willis at Experience Dental Laboratory in Utah, for his excellence in dentistry and porcelain artistry. Without him, I would not be practicing with such joy and predictability. Thank you, Mark, for your attention to detail and your fine work, especially in the realm of prepless veneers.
REFERENCES
1. Magne P, Douglas WH. Rationalization of esthetic restorative dentistry based on biomimetics. J Esthet Dent. 1999;11(1):5-15. doi:10.1111/j.1708-8240.1999.tb00371.x
2. Magne P. The biomimetically driven restorative dental practice. Dent Econ. 2022;2:14–6, 36.
3. Magne P, Belser U. Biomimetic Restorative Dentistry, Volume 1. 2nd ed. Quintessence Publishing; 2021.
4. Magne P, Belser U. Biomimetic Restorative Dentistry, Volume 2. 2nd ed. Quintessence Publishing; 2021.
5. Ceinos R, Lupi L, Tellier A, et al. Three-dimensional stereophotogrammetric analysis of 50 smiles: A study of dento-facial proportions. J Esthet Restor Dent. 2017;29(6):416–23. doi:10.1111/jerd.12304
6. Zarow M. Finding the centric relation — The Kois Deprogrammer. Style Italiano. 2018.
7. Kim J, Topolski R, Dickinson D, et al. The influence of lip form on incisal display with lips in repose on the esthetic preferences of dentists and lay people. J Prosthet Dent. 2017;118(3):413–21. doi:10.1016/j.prosdent.2016.10.028
8. Alhajj MN, Daer AA. A proposed linear skeletal distance to predict occlusal vertical dimension: A cephalometric study. J Prosthet Dent. 2017;118(6):732–5. doi:10.1016/j.prosdent.2016.12.022
9. Kois JC, Kois DE, Chaiyabutr Y. Occlusal errors generated at the maxillary incisal edge position related to discrepancies in the arbitrary horizontal axis location and to the thickness of the interocclusal record. J Prosthet Dent. 2013;110(5):414–9. doi:10.1016/j.prosdent.2013.06.005
10. Lux LH, Thompson GA, Waliszewski KJ, et al. Comparison of the Kois Dento-Facial Analyzer System with an earbow for mounting a maxillary cast. J Prosthet Dent. 2015;114(3):432–9. doi:10.1016/j.prosdent.2015.02.022
11. Thompson GA, Nick C, Francisco P, et al. Comparison of two arbitrary cast transfer systems with a kinematic facebow for mounting a maxillary cast on a semiadjustable articulator. J Prosthet Dent. 2021;S0022-3913(21)00002-0. doi:10.1016/j.prosdent.2020.12.023
12. Paiva TT, Machado RM, Motta AT, et al. Influence of canine vertical position on smile esthetic perceptions by orthodontists and laypersons. Am J Orthod Dentofacial Orthop. 2018;153(3):371–6. doi:10.1016/j.ajodo.2017.07.018
13. Del Monte S, Afrashtehfar KI, Emami E, et al. Lay preferences for dentogingival esthetic parameters: A systematic review. J Prosthet Dent. 2017;118(6):717–24. doi:10.1016/j.prosdent.2017.04.032
14. Stonisch MS. Smile Fitness. Fideli Publishing; 2017.
ABOUT THE AUTHOR
Dr. Stonisch is a pioneer in dentistry with more than 2,000 continuing education credit hours earned and 3.5 decades of experience. Accredited by the American Academy of Cosmetic Dentistry, a distinction held by fewer than approximately 40 female dentists worldwide, Dr. Stonisch combines her experience with degrees in art and chemistry to produce smart, sophisticated smiles in her comprehensive dental practice in Grosse Pointe, Mich. She is a Diplomate in the International Congress of Oral Implantologists and a mentor at the Kois Center in Seattle. Dr. Stonisch was the 2017 recipient of the Excellence in Business Award given by her community. She was also the recipient of the 2018 Spiritus Award from her alma mater, the University of Detroit Mercy School of Dentistry. Dr. Stonisch has authored an easy-to-read, step-by-step guide to oral health and common dental dilemmas for consumers (patients) called Smile Fit, along with a companion workbook, Smile Fitness. She holds 3 patents for her SMILE-NOW peel-and-stick dental templates, which allow dentists as well as patients to quickly and easily see smile possibilities. She can be reached at thesmileartist@comcast.net.
Disclosure: Dr. Stonisch reports no disclosures.


