Patients suffering from cracked tooth syndrome are usually very aware of a dental problem because of common symptoms that include chewing pain and increased sensitivity. However, there is often no dental decay present and virtually no radiographic evidence of a problem.
Cracked tooth syndrome can often be a result of bruxism. Without treatment, grinding seriously damages the tooth surface, leaving the dentition vulnerable to fractures, erosion, and even changes in facial appearance. Many patients do not realize they have bruxism, but when their dentist explains the consequences of their condition or when the cracked tooth syndrome becomes apparent to them, most want to begin preventive therapy immediately.
This article presents a case report in which a patient with bruxism and cracked tooth syndrome was diagnosed and treated in a single visit.
CASE REPORT
 |
| Figure 1. Pre-op of tooth No. 12 with occlusion marked. |
A 33-year-old male patient presented with a complaint of an acute, sharp, shooting pain when he bit down on his upper left side. He stated that this problem started a couple of days ago, and he noticed it most when he chewed on that side. The patient was asked if he noticed when he clenched his teeth or if he had a history of grinding. He stated that he did notice that in the daytime he would clench his teeth, and he also stated that he remembered waking up in the morning with sore jaw muscles. The patient was diagnosed with bruxism and was educated on the causes and solutions. Digital radiographs were made using a No. 2 Schick sensor. Both a clinical and periodontal examination revealed an unrestored tooth with normal periodontal health (Figure 1).
All teeth on the maxillary left side were percussion tested and examined for hot/cold sensitivity and all generated a normal response. A Frac-Finder (BDN, Inc) was then placed on all the cusps of tooth Nos. 11 through 13, and the patient was instructed to bite down. The Frac-Finder is a beneficial instrument for this particular procedure because it has a scooped out end into which a cusp tip fits and a flat end that allows the opposing tooth to apply concentrated force to a cusp without the patient having to over-exert the jaw. The patient exhibited pain when he bit down on the palatal cusp of tooth No. 12, and the pain lessened as soon as he released his jaw. The other teeth tested did not elicit any painful response. The patient was diagnosed with cracked tooth syndrome on tooth No. 12, as well as clenching and bruxism.
 |
| Figure 2. CEREC 3D Machine. |
The patient was educated in the operatory about cracked tooth syndrome using CAESY and was given a written description outlining all the possible outcomes that he could expect based on the complexity of the crack. The patient was told that a root canal might even be necessary if it was found that the crack was too complex. He was advised that if the tooth could be restored with a full porcelain-bonded crown, he could be treated for his clenching and bruxism, which could potentially prevent additional treatment. The patient elected the 1-appointment crown to treat the tooth and a 1-appointment solution to treat his bruxing/clenching problem. Because the tooth was rotated, it was also decided that we would try to improve the aesthetic appearance of this tooth by doing a composite mock-up and adding a more aesthetic mesial-facial contour. The patient elected the 1-appointment crown utilizing the CEREC 3D CAD/CAM system (Sirona Dental Systems, Figure 2).
By using the correlation mode in the CEREC 3D chairside CAD/CAM software, a new, more desirable contour was created, thus improving the mesial-facial line angle. The occlusion of the tooth with the mocked-up composite was checked using articulating paper (Bausch Articulating Products) to ensure there was no occlusal interference. The patient was anesthetized using 4% Citanest plain (prilocane HCL) without epinephrine (DENTSPLY Pharmaceuticals). After preliminary anesthesia, a second carpule of lidocaine 2% with epinephrine was administered.
 |
 |
| Figure 3. Nonlatex rubber dam with slit being cut. | Figure 4. Nonlatex rubber dam applied to teeth Nos. 3 through 8. |
A nonlatex rubber dam was applied using the split dam technique. After punching small holes for tooth Nos. 9 through 13 and a larger hole for tooth No. 14, the interproximal areas were cut between tooth Nos. 11 and 12 and 12 and 13 (Figure 3). By punching small holes in the dam material where the interproximal cut will be made, a tighter fitting split dam is created around those teeth, thus retracting the tissues and improving the seal to minimize saliva flow onto those isolated teeth. This makes the entire procedure easier, more predictable, and more efficient. An ivory 13A rubber dam clamp was placed on tooth No. 14, and orange wedgets dental dam stabilizing cord (Hygenic) was used on the mesial of tooth No. 11 and the mesial of tooth No. 9 to hold the dam securely in place (Figure 4).
 |
| Figure 5. Tooth No. 12 powdered after composite mock is done. |
 |
| Figure 6. Optical impression of tooth No. 12 pre-op in CEREC 3D. |
CEREC imaging liquid was applied to the teeth. This is a polysorbate liquid that creates a sticky surface on the teeth and the soft tissues. Preoperatively, a thin layer of titanium-dioxide powder was applied to the surface of the teeth and the surrounding tissues (Figure 5). This powder provides an opaquing material necessary to create a definitive and reflective surface for CEREC 3D’s infrared beam to capture an optical image, thus generating the preoperative optical impression (Figure 6). Once captured, the image is stored in the image catalog in the occlusion file.
 |
| Figure 7. Disto-mesial picture of the crack. |
A full-crown preparation was then initiated. The crack became visible and was stained using Snoop caries detection (Pulpdent) to check the gingival extensions of the crack (Figure 7). This was done to ensure that the crack would not go beyond the gingival margin of the machinable ceramic crown. A sloping shoulder buccal margin was used to create an aesthetic disappearing facial supragingival margin.
 |
| Figure 8. CEREC 3D crown prep. |
 |
| Figure 9. Optical impression of the tooth No. 12 powdered crown prep in CEREC 3D. |
 |
| Figure 10. The porcelain restoration of tooth No. 12 presented on CEREC 3D. |
 |
| Figure 11. Mesial contact manipulation in CEREC 3D. |
 |
| Figure 12. Preview of the porcelain crown in CEREC 3D. |
A bipolar electrosurgery device (Ellman) with a straight tip was used to remove any gingival tissue necessary to reflect a clearly exposed gingival margin. Then the same opaquing medium was applied to the preparation (Figure 8), and an optical impression was made (Figure 9). Both optical impressions were aligned so they could be matched and generate a virtual model. The cavity margin should be displayed as sharp, distinct lines that are easily traced around the preparation. Both images were stored in the tooth library, and the green arrow was pushed, telling the computer to match the images and produce a virtual model. The dies were trimmed and the margin was placed with digital precision using the automatic margin finder. The margin was checked by rotating the virtual die, and any corrections were made. The virtual restoration was then verified from an occlusal view (Figure 10), contact shape and pressure were verified (Figure 11), and a final preview of the restoration was presented for any final adjustments before milling (Figure 12). The software then indicated the proper size block to insert in the milling chamber (in this case, a A2C size 14 Vita Mark II block from Vident).
Milling was completed, the crown was tried in, and the occlusion was checked using Bausch Articulating paper. The restoration was polished using Cera Glaze-NTI porcelain finishing wheels (Axis). The internal porcelain surface was air-abraided and etched with 5% hydrofluoric acid (Vita) for 60 seconds, then rinsed and dried. Monobond-S (Ivoclar Vivadent) silanation agent was applied for 60 seconds and then air-dried. An unfilled resin adhesive coating (Excite, Ivoclar Vivadent) was applied and air-thinned. The preparation was etched with 32% phosphoric acid with BAC (Bisco) for 20 seconds and thoroughly rinsed with water spray for an additional 20 seconds. Gluma (Heraeus Kulzer) was applied with a microbrush (Microbrush Products), air-dried after 20 seconds, then another 2 applications were applied using a new microbrush, then thoroughly air- dried and light-cured for 20 seconds.
 |
 |
| Figure 13. Buccal view of bonded crown tooth No. 12. | Figure 14. Occlusal view of bonded crown tooth No. 12. |
NT Prime & Bond (DENTSPLY Caulk) was applied to the tooth with a microbrush and then light- cured for 20 seconds. Variolink II (Ivoclar Vivadent) translucent base and catalyst resin cement were placed into the crown; then it was seated. A 20-second light cure initiated the resin cement. The occlusion was checked, and the final polishing was done in the mouth with Luminescence polishing paste (Abrasive Technology). The result was an aesthetically pleasing ceramic full crown in one visit (Figures 13 and 14).
 |
 |
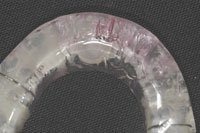
| Figure 15. BruxGuard kits. | Figure 16. BruxGuard inserted. |
To protect the patient from further destruction of his restorations resulting from bruxism, a BruxGuard (Dental Concepts, Figure 15) was selected for its convenient chairside fit and unique combination of plastics with a hard side that eliminates bite-through. The Brux-Guard was tried in, fabricated, and fit within minutes (Figure 16). The patient was instructed to wear the bite-plate nightly to prevent any future restorative problems that could result from his bruxism.
CONCLUSION
Cracked tooth syndrome will often subject patients to mild to severe pain. Bruxism can be a serious condition that can often result in multidisciplinary restorative procedures. Alleviating the pain with a 1-visit machinable ceramic via chairside CAD/CAM and protecting the teeth from further damage with a 1-visit bruxism solution is ideal.
Dr. Benk is a graduate of Emory University School of Dentistry, where he served on its restorative faculty before the school closed. He has a fellowship with the International College of Oral Implantologists. In private practice in Atlanta, he can be reached at (404) 872-7755 or jrbenkdds@earthlink.net.
Disclosure: Dr. Benk is on the faculty of the CEREC Success Center of the Southeast, where he provides training to both dentists and their staffs on CEREC 3D basic, intermediate, and advanced courses. He is a certified Patterson Basic Trainer for CEREC 3D and lectures on practice integration of CEREC 3D and the advantages of machinable ceramics.