Your patients love it, appreciate it, and want you to use it.
That is the conclusion I have made after utilizing a wonderful tool—the intraoral camera—for the past 18 years. Our patients are accustomed to looking at a TV monitor; therefore, they are comfortable, receptive, and relaxed when looking at their photos on a monitor. They are very appreciative of a technology that helps them understand problems they have, and they are very grateful when—at the end of an appointment—they can sit up, view where their treatment started and see the stages that were required to reach an end result that is comfortable and a very close resemblance to nature.
Simply talking about all the above without the benefit of the visual aspects does not mean as much. In this article, I will give you our routine for patients, how we use the intraoral camera at the first visit, and how we use it during treatment. I will also include a commentary from my treatment coordinator Cathy, a certified dental assistant (CDA), as to what she feels the advantages are to both patients and staff when everyone is trained to use the intraoral camera.
THE FIRST VISIT
The patient’s first visit is important. At this time we must establish rapport, a sense of trust, and a feeling that the patient has made the correct decision in selecting our office to entrust with the care of his mouth. A tip I will give you is a question that we have added to our first visit protocol. The question is, “How do you wish to be addressed?” We have found that this question puts our patients quickly in their comfort zone. It tell us if they are most comfortable on a first name basis or on a more formal name basis (eg, Mrs., Mr., Dr., etc) and allows me to respond by introducing myself as either Ken or Dr. Neuman, depending on their comfort level.
Our examinations are set up with a checklist approach. We explain this to our patient so it has 2 benefits: (1) we are consistent in our information gathering; and (2) it allows them to participate in the examination process by listening to the answers to the checklist questions.
 |
 |
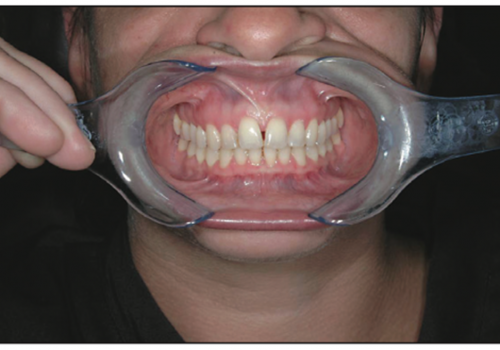
| Figure 1. Photo of patient’s smile. | Figure 2. Photo of maxillary arch. |
 |
| Figure 3. Photo of mandibular arch. |
Cathy will make the patient comfortable, complete a dental history questionnaire, and then explain to the patient that she will be taking some photographs of the patient and his teeth. She takes 4 photos: full face; smile (Figure 1); upper arch (Figure 2); and lower arch (Figure 3).
These photos are left on the screen for the patient to view, and in most cases, this will be the first time the patient has seen the inside of his mouth and can see the various restorations that exist.
 |
| Figure 4. Close-up photo. |
As we proceed through the exam procedure, we inform the patient that if we see any problems he needs to be aware of, we will take close-up photos of the areas, then look at them together (Figure 4). We often have patients tell us how much they appreciate being able to see their teeth in this way. I truly believe we owe it to our patients to educate them as much as we can, and I know of no better way to accomplish this than with the proper use of an intraoral camera.
 |
 |
| Figures 5 and 6. Photos of areas in need of treatment help educate the patient. | |
 |
 |
| Figure 7. Pretreatment photo. | Figure 8. Posttreatment photo. |
When we are ready for treatment, Cathy will take intraoral photos of the areas we will be treating that day (Figure 5). As we progress, we photograph anything we think will help the patient’s understanding of what we are doing (Figure 6). At the end of the appointment, we will sit the patient upright, and while he uses a scented hot towel to soothe his face, we will go through the series of photos and show him what was done and the final result (Figures 7 and 8). (Note: The restorations shown were completed using the Cerec 3 CAD/CAM system and 3M ESPE’s Paradigm resin-based block).
A CDA’S OPINION
“I have been a CDA for the past twenty-four years,” said Cathy, “and in the past, patient acceptance was low because of the way we provided information to them. Communication and acceptance are two very different things. Patients may not comprehend verbally, but a picture is worth a thousand words.
“One of the greatest tools we use in dentistry today is the intraoral camera. From my experience, it has allowed me to feel part of the treatment plan. It has built my confidence level and encouraged me to be better educated to answer the questions that patients ask after viewing the pictures. The clarity of the photographs creates patient acceptance and improves the quality of the dentistry we provide. The camera does not miss excess material, short margins, etc. Many times, patients will point to the problem areas and understand what they need. Thus, practice profitability increases.
“From the patients’ perspective, for the first time they see what we see. It opens the door for better levels of understanding and education about their mouths. It creates instant trust, and communication flows along with questions, all-important in establishing a relationship. It creates a ‘wow’ effect in viewing problem areas and healthy ones. Many times, patients will tell us what they need. The camera is fun to use, comfortable, and painless.”
CONCLUSION
If you have an intraoral camera, consider adopting what you have read here and making it a routine experience for your patients. It will truly set you apart from the nonuser, and you, your staff, and your patients will benefit.
Dr. Neuman maintains a general practice in Vancouver, BC, with an emphasis on cosmetic dentistry. He is an accredited member of the American Academy of Cosmetic Dentistry. He works with Dr. Gordon Christensen as a CRA evaluator. He has earned fellowships in the Academy of General Dentistry, the Academy of Dentistry International, the International College of Dentists, and the American College of Dentists. He has been honored by Dentistry Today by being named one of the Leaders in Continuing Education. He can be reached at drkneuman@shaw.ca.