


INTRODUCTION
The art and technique of direct composite restoration of anterior teeth continues to gain popularity with a demand for minimally invasive procedures. Social media is a significant source of information for patients to view the possibilities for anterior restorative options through photographs and videos posted by dentists. For many dentists, the challenge of understanding which composite(s) to use, how to layer it, how to appropriately prepare the tooth, and how to finish and polish the final restoration can be frustrating. Again, social media can be a powerful source of information about techniques and materials that are commonly being used by well-known dentists around the world.
The most common direct composite restorations on anterior teeth are Class IV fracture repairs and adding incisal length. In either case, there is a hard incisal edge that has to be masked out, and one of the most common mistakes is having a show-through of the incisal edge against the more translucent composite. In addition, if a more opaque shade is used, it will not blend against the opalescence of the natural tooth. The challenge for most dentists is to know how to layer the different types of composites if using a polychromatic approach. Similarly, with the advent of new single-shade composite systems that simplify tooth color matching without complicated layering, there are still principles of layering that need to be followed for optimum results.
There are 2 basic principles to consider in order to create a direct composite restoration that blends and masks properly. First, the tooth preparation should include a proper inciso-facial bevel to allow for feathering of the composite onto the facial surface. Second is the proper application of the single-shade composite system in conjunction with the supplementary product, which typically has more opacity. One way to consider these 2 materials is to think of the omnichromatic composite functioning as the enamel with a certain amount of translucency and the supplementary composite functioning as the dentin with more opacity. The examples shown below will illustrate common errors when using these 2 materials on an extracted lower anterior tooth and then give a clinical example of how to properly use it.
CASE REPORT
There are differing opinions on creating an ideal inciso-facial bevel for direct anterior composite restorations. Nevertheless, the principle of creating a bevel is true for both increased retention as well as aesthetic blending of the composite. The exact size and shape of the bevel is not the focus and will not be addressed here. In the following examples, a conservative 45° infinity bevel was used as well as air abrasion with 27-µm aluminum oxide (Figures 1 and 2). As a reference, the single-shade composite system used in these examples is OMNICHROMA (Tokuyama Dental America). However, similar single-shade composite systems can follow the same principles outlined herein.
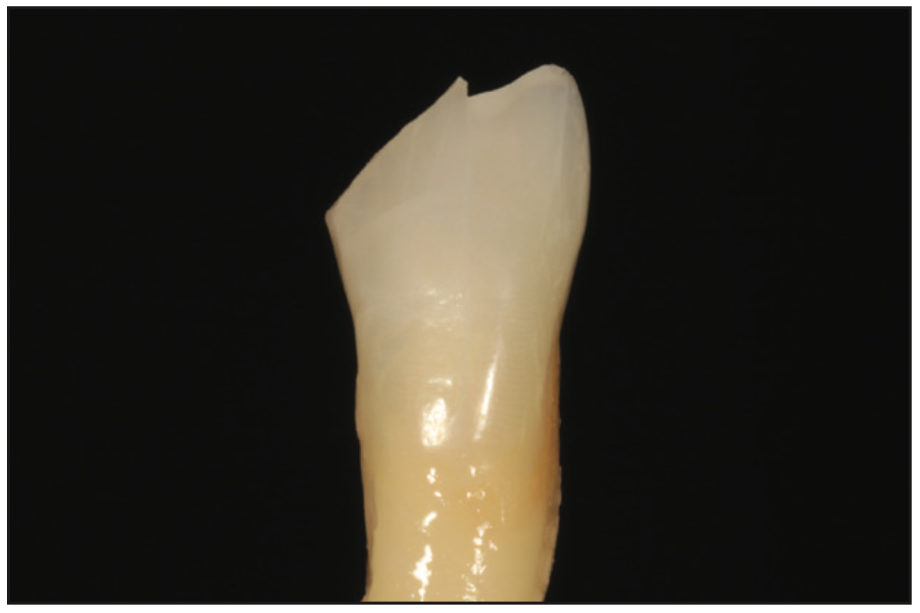
Figure 1. Extracted lower incisor showing a common type of Class IV fracture.
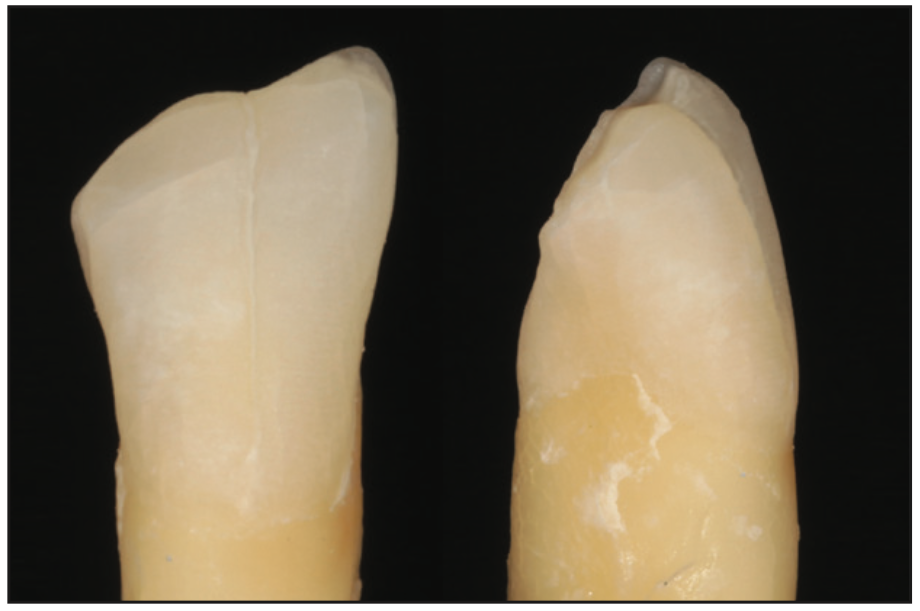
Figure 2. Facial and lateral views showing a conservative 45° infinity bevel and micro-air abrasion with 27-μm aluminum oxide.
For the first example, only OMNICHROMA was used. What you will notice is that there is too much translucency in the final restoration, and you can see the hard line of the fracture through the composite (Figure 3). This occurs because a single-shade composite system does not have any color and cannot mask a hard line by itself. A single-shade composite system obtains its color from the underlying tooth structure, so when it is used to restore surfaces beyond the natural tooth, it will result in show-through and appear gray or translucent. To correct this problem, a supplementary composite must be used in conjunction, which will be explained and shown below.

Figure 3. Only OMNICHROMA (Tokuyama Dental America) was used to restore the entire restoration, which ended up having show-through, and the hard incisal edge was visible, creating an unsatisfactory result.
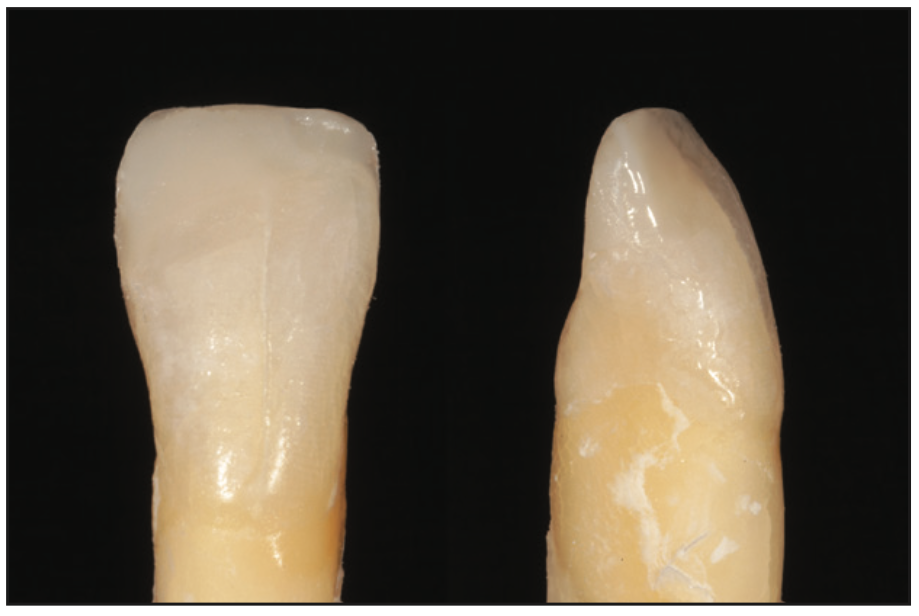
Figure 4. Too much OMNICHROMA BLOCKER (Tokuyama Dental America) was used to create the lingual shelf, which went over and onto the facial surface.
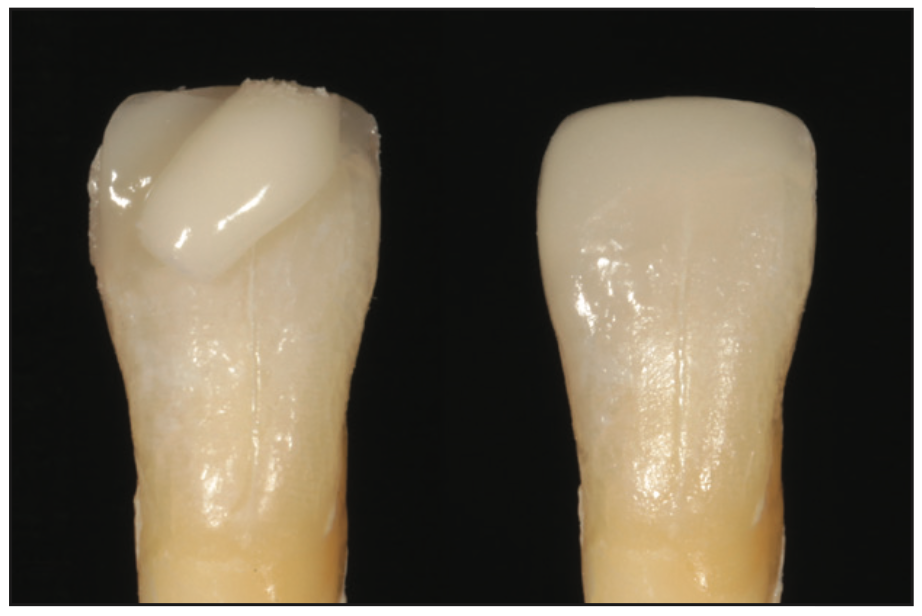
Figure 5. With too much BLOCKER, the final restoration ends up looking opaque even after the final layer of OMNICHROMA is placed.
In the second example, the supplementary composite, OMNICHROMA BLOCKER, was used to create a palatal shelf. OMNICHROMA was then placed and sculpted to the final contour and polished. As you can see, the BLOCKER layer was placed too thick (Figure 4). When this happens, the final restoration will have too much opacity, and the hard incisal edge will still be visible. However, instead of being too translucent like in the first example, it was too opaque and reflective (Figure 5). The error here was that the supplemental composite was feathered over and onto the facial surface rather than keeping it back by the linguo-incisal line angle. Care must be taken to place and shape this lingual shelf appropriately.
In the third example, the BLOCKER and OMNICHROMA were placed correctly. This was done with the aid of a silicon putty matrix made from a diagnostic wax-up, but it could similarly be done using a mylar strip to create a basic palatal shelf. Both are acceptable methods. Freehand layering of composite without the aid of a lingual guide is more difficult in controlling the thickness and shape. To correctly layer the BLOCKER as a palatal shelf, it is important not to let it go onto the facial surface but rather keep it back against the palatal aspect of the incisal edge (Figure 6). There is no perfect or magical thickness measurement, but it should be kept to 0.5 mm or less. If it is too thin, you will know immediately because once the palatal layer is cured, you will be able to see through it. If this is the case, just add a little more BLOCKER. Once we were satisfied with the palatal shelf layer, OMNICHROMA was placed to the final contour (Figure 7). Some composites have a creamier consistency; therefore, some dentists prefer to place it in several layers rather than one thick layer for easier sculpting without slumping.
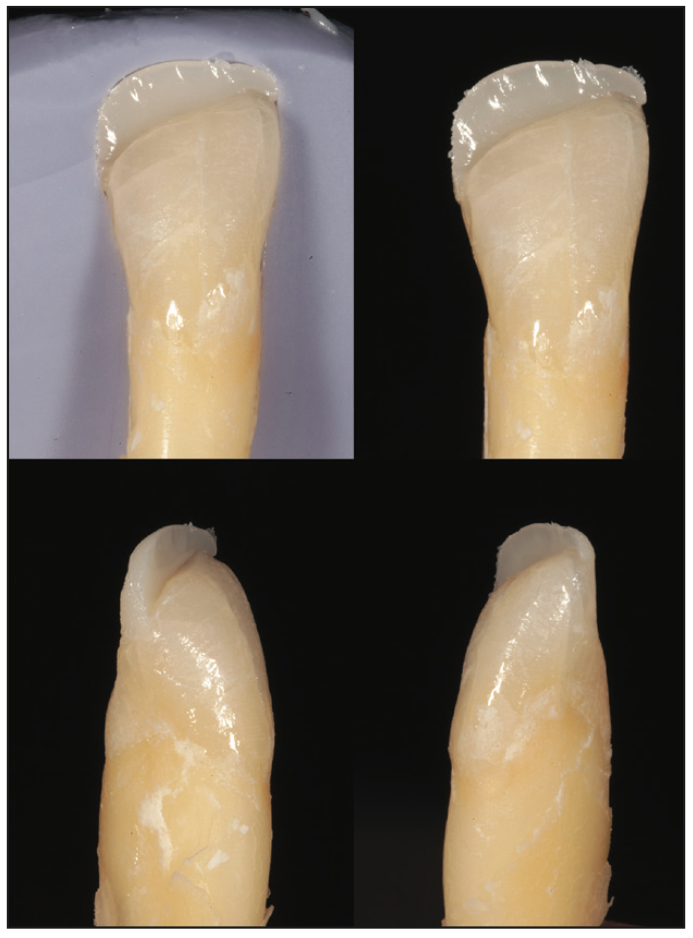
Figure 6. Proper layering of the BLOCKER lingual shelf with a thickness no greater than 0.5 mm and not overlapping onto the facial surface.
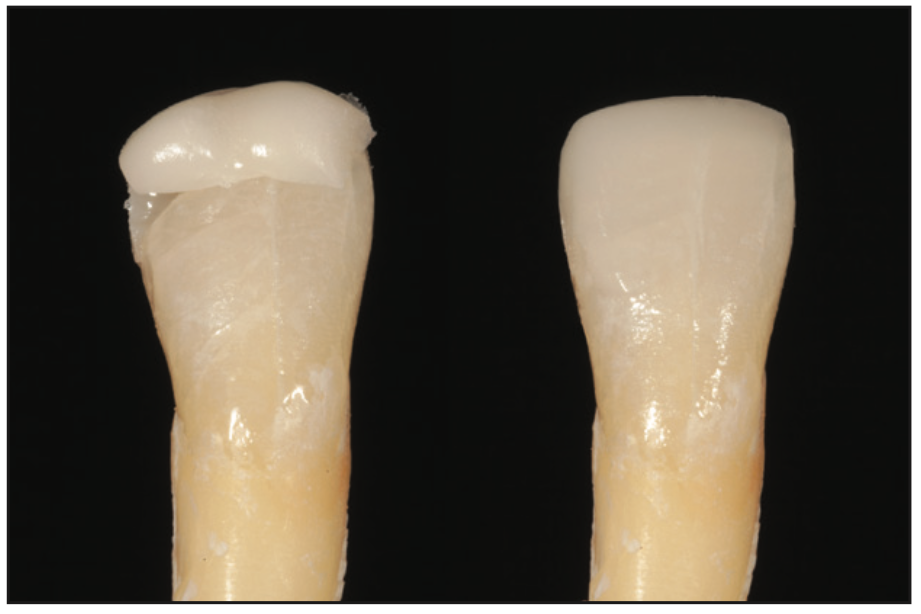
Figure 7. Final layer of OMNICHROMA over the BLOCKER lingual shelf.
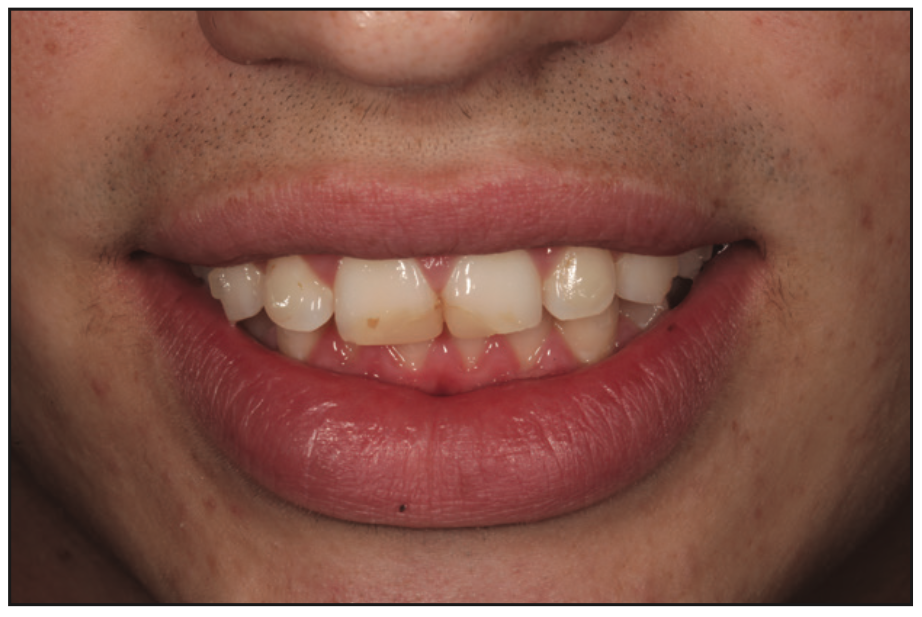
Figure 8. Preoperative full smile view of teeth Nos. 8 and 9 with old composites that were stained and failing.
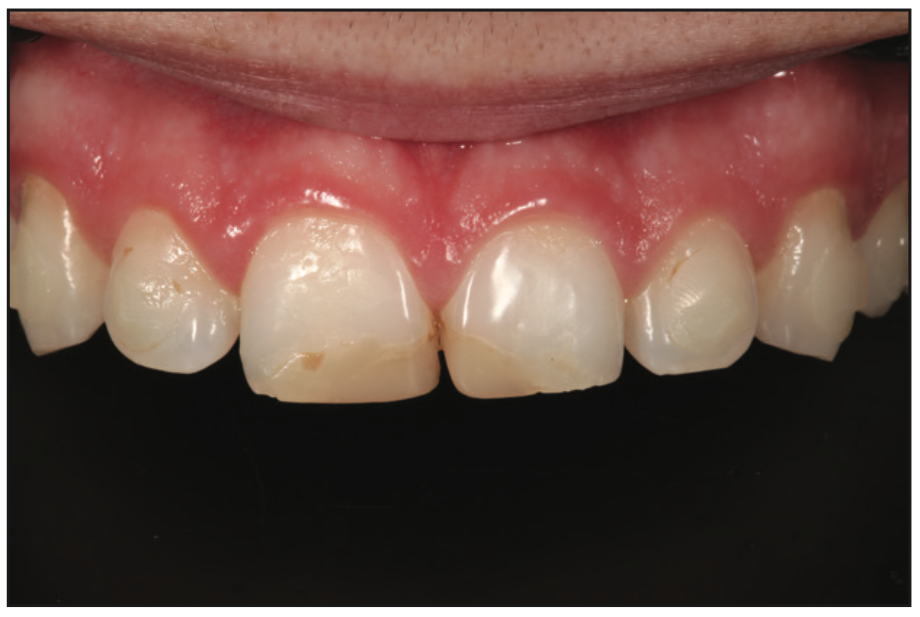
Figure 9. Pre-op retracted view of teeth Nos. 8 and 9 with old composites that were stained and failing.

Figure 10. Close-up view of a tooth preparation using a 45° bevel and micro-air abrasion.
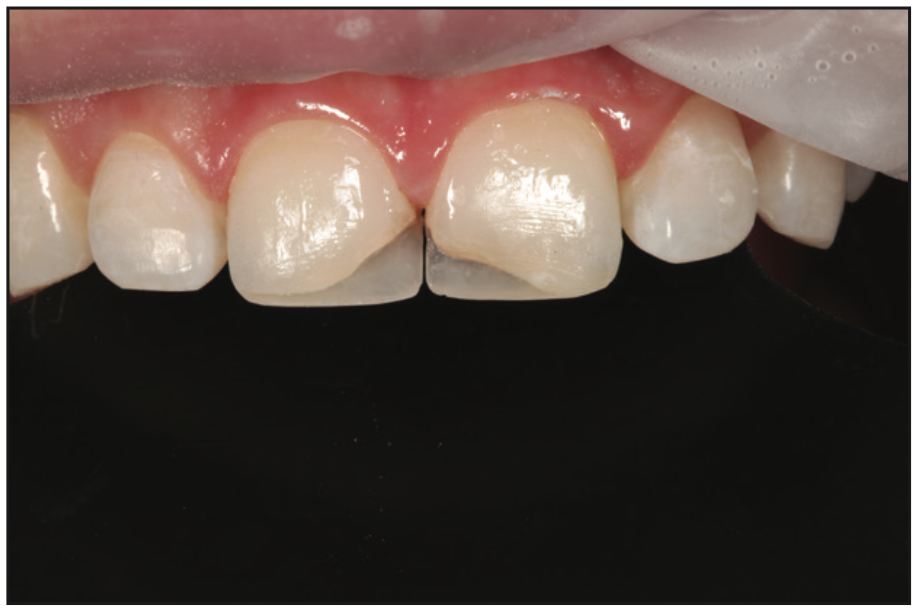
Figure 11. A thin lingual shelf fabricated with OMNICHROMA using a silicon putty index made from a diagnostic wax-up. This layer must be very thin and must not overlap onto the facial surface.
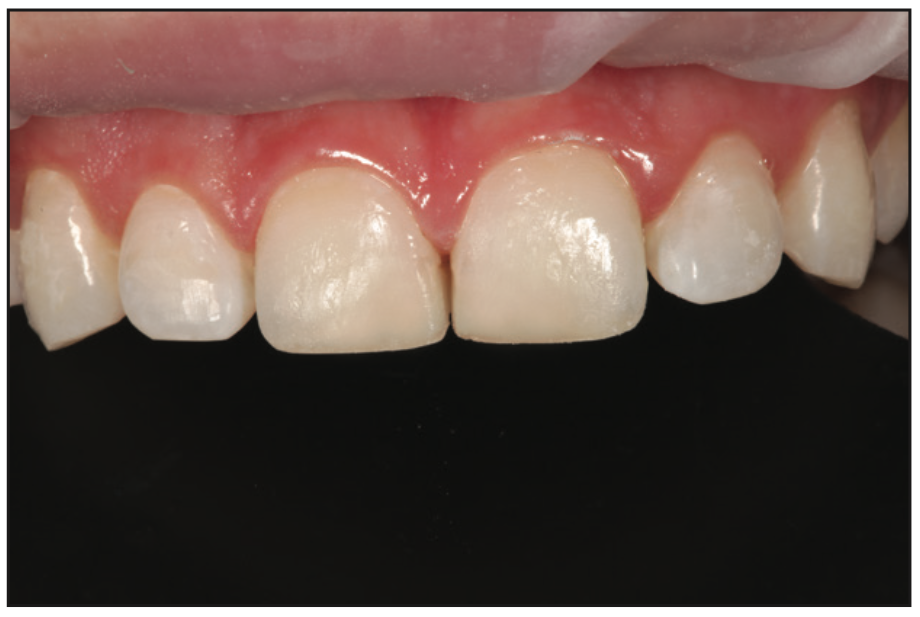
Figure 12. BLOCKER layer applied to mimic the dentin layer while leaving suf- ficient space for the final OMNICHROMA layer.
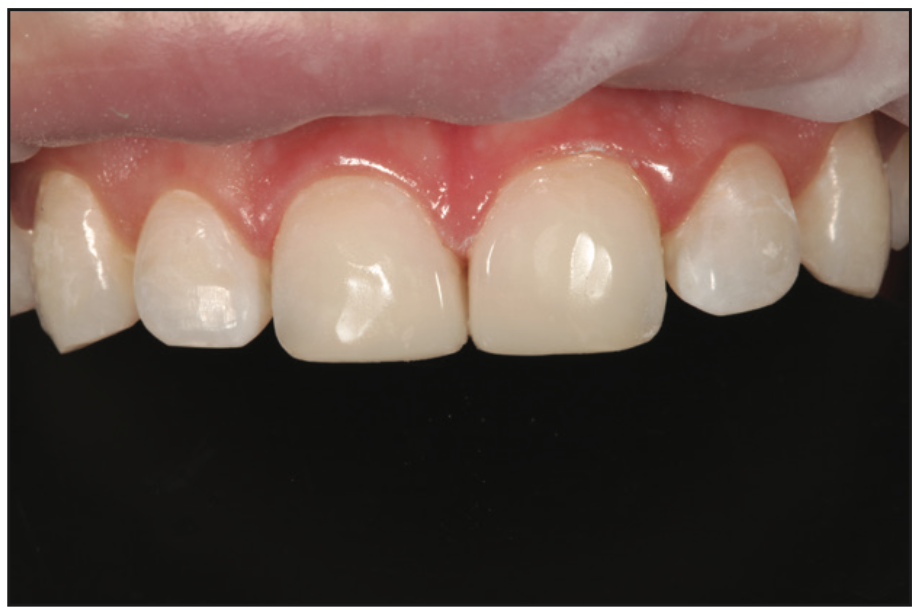
Figure 13. Final OMNICHROMA layer placed using Mylar strips to form interproximal contacts and embrasures.
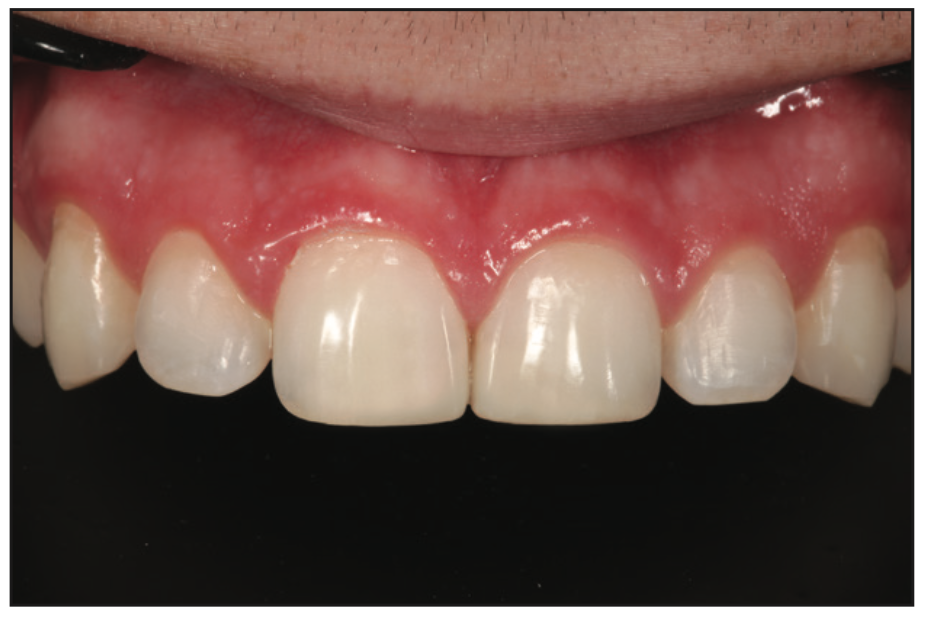
Figure 14. Immediate postoperative retracted view of the final restorations.
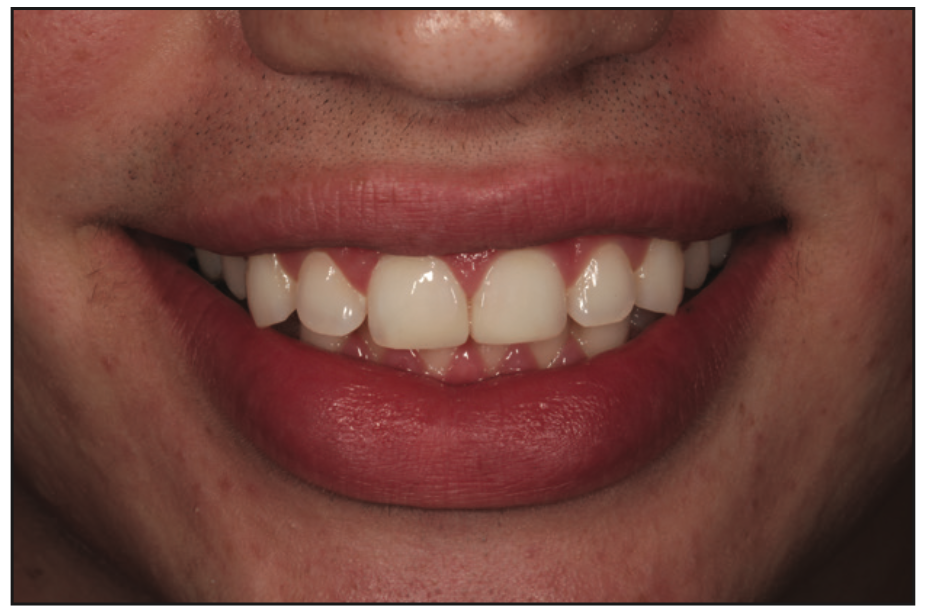
Figure 15. Immediate post-op full smile view of the final restorations.
The final example shows a clinical case where a modified layering technique was used to achieve maximum aesthetics with this single-shade composite system. Teeth Nos. 8 and 9 were previously restored in this patient’s youth after a skateboard accident. These restorations had functioned well for a number of years, but the patient had become more self-conscious and concerned with the show-through and appearance as the margins began to stain (Figures 8 and 9). The old composites were removed without anesthetic using a coarse diamond bur (Komet) and Sof-Lex disc (3M). A fine-grit diamond bur (Komet) was then used to create a 45° infinity bevel, and this was followed by air abrasion (MicroEtcher II [Zest Dental Solutions]) well beyond where the estimated composite finish line would be (Figure 10). Likewise, the acid etch and bonding resin were placed well beyond the estimated finish line, ensuring that the composite margin would be seamless after finishing and polishing. Using the silicone putty index (Burkhart Dental), the palatal shelf was created with a very thin layer of OMNICHROMA (Figure 11). The BLOCKER was then sculpted to replicate the dentin layer (Figure 12). This was done by feathering the BLOCKER onto the facial bevel just enough to block out the hard fracture line while leaving enough space to place a final layer of OMNICHROMA over the top. A Mylar strip was used to pull the final layer of OMNICHROMA interproximally and shape the facial embrasures (Figure 13). Shaping and polishing were completed with a series of Sof-Lex discs (3M), burs (Komet), and composite polishers (Kerr). Although the surrounding dentition was dehydrated, the immediate postoperative photos show how well a single-shade composite system works when layered properly (Figures 14 and 15). In some cases where the teeth are highly characterized with translucency or white spots of hypocalcifications, colored resins can be used to paint and create the desired subtle effects before placing the final thin layer of the single-shade composite. In this particular case, it wasn’t needed, and it was the desire of the author to show how a single-shade composite system can look without overcomplicating the process.
CONCLUSION
Hopefully, this article is successful in not only showing how to correctly handle and layer a single-shade composite system to achieve excellent results but also to help one understand what not to do so you can avoid common mistakes that result in patients being unsatisfied and the dentist being frustrated. With a better understanding of how a single-shade composite system works and why a supplementary material is needed in situations like adding length, you can be more confident in getting it right the first time. Or if an error is made, you will know what went wrong and how to fix it and be less likely to repeat the mistake in the future. Like anything in dentistry, or in life for that matter, practice makes perfect. Anyone who wants to master a technique or become familiar with a new composite or dental material should take the necessary time to practice and perfect it. One of the advantages of a single-shade composite system is that it is very forgiving, and there is more room for error to still end up with acceptable results because of its omnichromatic color-matching ability. Find your balance and get the ideal shade match you are looking for with this single-shade composite system.
ABOUT THE AUTHOR
Dr. Brown attended the University of Washington school of dentistry and has been in private practice in Bellevue, Wash, since graduating in 2006. He quickly fell in love with the art of direct composite bonding and the versatility of composite resins and developed his composite handling skills through the accreditation process of the American Academy of Cosmetic Dentistry. He also enjoys photography and uses it in his everyday practice to improve his clinical dentistry, lab communication, patient education, and training of other dentists. He has a passion for minimally invasive cosmetic techniques and has published numerous articles and lectures on direct and indirect anterior smile enhancement. Dr. Brown enjoys learning and sharing what he knows with others. You can see many of his techniques that he shares on Instagram @dr.kevinbrown. He can be reached by email at kbrown@kmbdds.com or the Instagram handle @dr.kevin_brown.
Disclosure: Dr. Brown received an honorarium from Tokuyama Dental America for writing this article.
UPCOMING WEBINAR
Dr. Brown will present a FREE Live Webinar on October 20, 2023, expanding on this article’s topic.
Click here to visit dentistrytoday.com/webinar and sign up today!


