


 Dentsply Sirona’s New Self-Adhesive Resin Cement Features a Wide Tack-Cure Window and Extended Gel Phase for Easier Cleanup
Self-adhesive resin (SAR) cements are designed to offer procedural and clinical advantages over the other cement categories. SAR cements’ ease of use is similar to glass ionomer (GI) and resin-modified GI (RMGI) cements but provides higher bond strengths, improved aesthetics, and dual curing. Also, because SAR cement is resin-based, it can be used for cementation of low-strength ceramics (eg, lithium silicates), whereas GI and RMGI cements are usually not recommended. Compared to adhesive resin cements, SAR cement does not require an additional bonding step; however, both require isolation for effective use.
Despite the advantages of SAR cement, a possible clinical challenge involves the cleanup step where all excess cement must be removed to prevent postoperative problems. Many dentists tack-cure resin cements to initiate a gel phase during which the material can be easily removed with an explorer or hand instrument. However, some existing products have a very small window for tack-curing, allowing the dentist only one to 2 seconds of light-curing before the material cannot be removed with a hand instrument. In this case, the hardened material must be removed with a bur, which can be very difficult and messy, especially in the posterior interproximal areas.
To help dentists prevent overcuring during this critical phase, Dentsply Sirona Restorative has introduced Calibra Universal Self-Adhesive Resin Cement, a new SAR cement that offers a wide tack-cure window of up to 10 seconds (ie, 5 seconds buccal and 5 seconds lingual) and an extended 45-second gel phase. This means dentists can now benefit from the convenience of tack-curing without the stress of overcuring, allowing them the time needed to thoroughly remove excess cement and avoid using a bur, which may traumatize surrounding gingiva and damage the new restoration.
The indications for Calibra Universal include use with (1) endodontic posts, (2) metal crowns and PFMs, (3) alumina and zirconia crowns, and (4) all-ceramic restorations, all without the need for a separate bonding step. With a choice of 5 shades—all featuring Shade Stable technology to virtually eliminate shade shifting over time—the patient and dentist can be assured of beautiful restorations.
Clinical Case Example
Approximately 3 weeks after removing existing PFM restorations on teeth Nos. 8 and 9, the patient returned for final delivery of lithium silicate crowns (Figure 1). The provisionals were removed, and the excess cement removed. The crowns were adjusted for interproximal contacts, occlusion, and aesthetics. The intaglio of the restorations were pretreated with Porcelain Etchant 9.5% hydoflouric acid (BISCO Dental Products) followed by Calibra Silane Coupling Agent (Dentsply) according to manufacturer’s instructions.
 |
 |
| Figure 1. Final preparations of teeth Nos. 8 and 9 after removal of older PFM crowns. | Figure 2. After properly treating the intaglio of the lithium silicate restorations, Calibra Universal Self-Adhesive Resin Cement (Dentsply Sirona Restorative) was placed into the crowns via an automix syringe. |
 |
 |
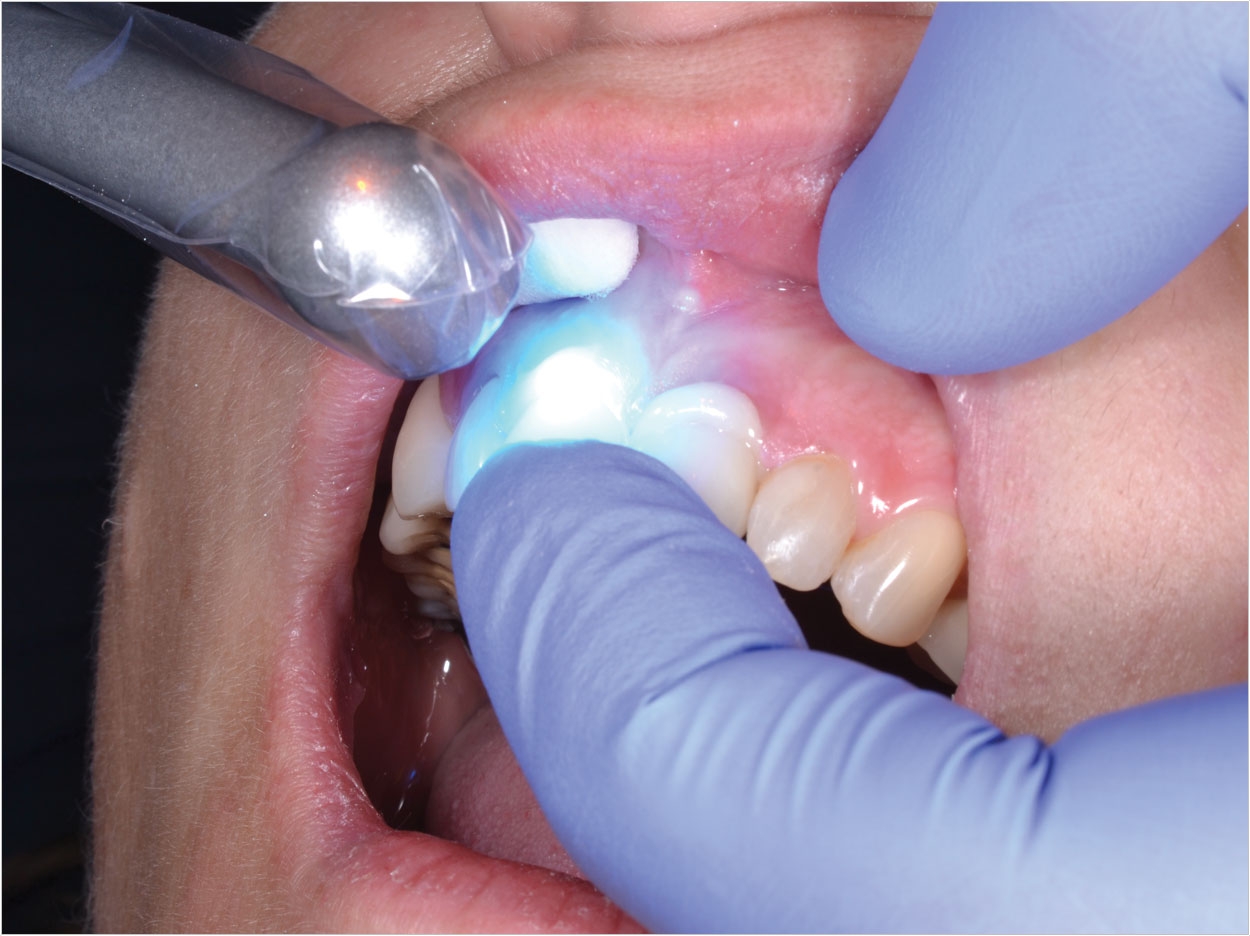
| Figure 3. Both restorations were firmly seated with finger pressure. Note the excess cement at the margin. | Figure 4. The crowns on teeth Nos. 8 and 9 were stabilized with finger pressure and tack-cured for 5 seconds on both the buccal and lingual surfaces with a monowave LED curing light. |
 |
 |
| Figure 5. After tack-curing, Calibra Universal Self-Adhesive Resin Cement in the gel phase easily peeled away from the restorations’ margins. | Figure 6. The final restorations on teeth Nos. 8 and 9 immediately after cementation with Calibra Universal Self-Adhesive Resin Cement. |
Calibra Universal Self-Adhesive Resin Cement opaque shade was prepared for use by bleeding the dual-barrel automix syringe prior to attaching a mix tip to ensure both base and catalyst were expressing evenly. Then, the mix tip was installed, and a small amount of material was dispensed onto a mixing pad to again ensure adequate mix of the cement components. Without delaying, a thin, uniform layer of cement was dispensed onto the entire internal surface or the restoration directly from the mixing tip (Figure 2.) The crowns were then immediately seated onto the cleaned and slightly moist preparations (Figure 3).
The buccal and palatal aspects of the restoration were tack-cured for 5 seconds each using a Smartlight Focus Pen-Style LED Curing Light (Dentsply), initialing a gel phase (Figure 4). The cement was gently removed using an explorer, and great care was taken to avoid causing gingival bleeding (Figure 5). Interproximal excess was removed by stabilizing the restorations and flossing the areas. Horizontally removing the floss after each area was verified.
After successful removal of excess cement, the restorations received a 20-second light cure from the buccal, palatal, and incisal. At this point, final verification of interproximal contacts, occlusion, and aesthetics was completed, and the patient was released (Figure 6).
Dr. Goodchild is a general dentist practicing in Havertown, Pa. He is a clinical associate professor at the University of Pennsylvania School of Dental Medicine in the department of oral medicine and a clinical education manager for Dentsply Sirona Restorative.


