
Dr. Andrew Hall is a general dentist and the owner of The Studio for Exceptional Dentistry in Colorado Springs, CO. He has worked with CEREC for many years and teaches courses on the technology as a faculty member of the Scottsdale Center for Dentistry. In this interview, Dr. Hall discusses his experiences testing and using the recently launched CEREC Tessera Advanced Lithium Disilicate CAD/CAM Blocks for restorations.
Dr. Hall, how long have you been working with CEREC Tessera?
I’ve been using it since its inception. I participated in some of the early meetings [with Dentsply Sirona] looking into what would be beneficial for clinicians as a next step in a restorative material. That was in late 2017.
By 2018, we started getting some material with which we could familiarize ourselves. In early 2019, we started being able to use the material in a clinical setting and began placing the actual material. By that point we had a full working product and were beta or alpha testing it. Since 2019, I’ve had quite a long time to work with the material clinically, which is not typical prior to a new product material launch. I have cases using the material that I’ve been able to follow for a couple years now. And that’s before the material even launched, which means that there is quite a lot of data behind the product already.
What was your first impression of CEREC Tessera?
Given my involvement with the material from the beginning, what initially most astounded me was the speed that we could fire the material while still achieving such a robust restorative material. In one of the early conversations with the Dentsply Sirona team, we were stunned to learn that it would be possible to achieve around a four and a half minute firing cycle. Once they explained the process and the research behind it, we were absolutely amazed.
When I actually began to use the product and see the results, I was extremely happy with the nice balance of speed, esthetics, and strength.
What is the restoration process like using CEREC Tessera and what are the differences to other materials such as conventional glass ceramics or zirconia?
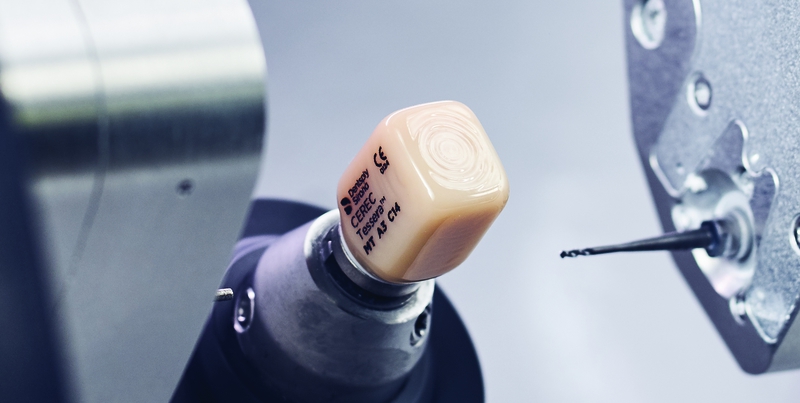
It’s important to note that the material is still a glass ceramic, therefore the manufacturing process is essentially what would be used for traditional glass ceramics. That said, the real difference comes after the milling process – in the esthetic modification or enhancement of the material.
CEREC Tessera can be fired in conventional ovens but is optimized to work with the CEREC SpeedFire oven. The key to this whole process is the ability to preheat the oven, which enables that reduction in the firing time.
As soon as the milling is completed and the glass ceramic crown is sitting in the milling chamber, I go to the SpeedFire’s touchpad and press the preheat button to bring the temperature to 400 °C. It takes about a minute to pre-heat. I use that time to remove the sprue, which is common to all glass ceramics. The handling of the material is very simple and there are no putties to use like in some other glass ceramics. There is a moldable silicone holder onto which the clinician can set the restoration when working on it, for example when applying a glaze.
Once I see that the oven temperature has reached 400 °C, I remove the restoration from its silicone holder and set it onto a small honeycomb tray that has a firing pad on it and center the restoration. From the time I hit start for the firing cycle, in the SpeedFire oven it takes under 5 minutes to process.
The workflow is very well defined and can be simple for the clinician, the assistant, or auxiliary team member – whoever is helping in that process of finishing the restoration.
When planning single-visit, chair-side CAD/CAM dentistry there are fixed timeframes for different parts of the process and anytime we can significantly improve upon one of these fixed times, it will make a significant difference. With the CEREC Tessera material, we can greatly impact the timeframe of the firing cycle by reducing it to under 5 minutes. In the course of a year of appointments, you’re saving a lot of time for yourself, your practice, and your patients.
For which indications do you use CEREC Tessera and why?
I have used glass ceramic with CEREC restorations for almost 16 years now. In the past, clinicians have selected different materials based on different circumstances and goals of the restoration. CEREC Tessera is probably the first material that can really be used anywhere comfortably because of that blend of characteristics that I mentioned previously. The material can be used for posterior restorations because of its robust strength and since it has high-glass content, it is also esthetically pleasing for anterior restorations.
So far I have used it everywhere from second molars to the single central incisor and I haven’t had any reservations about using the material in any particular spot in the mouth.
Something that I find particularly useful with the material is the fact that I know I can bond in glass ceramics. There is some flexibility to the material as well in that it allows for conventional cementation. This is really nice from a clinical standpoint because there are cases that may set up better for this or clinicians that may just want to take this approach. This material will be very conducive to how they practice.
On the other hand, another clinician’s training may be more for resistance-retention type of prep and this clinician would want the ability to conventionally cement. CEREC Tessera can be comfortably used in that capacity as well. Simply stated, the material gives the clinician options.
What advice would you give to colleagues who want to use CEREC Tessera in their dental practices?
I would give two pieces of advice: One, I think they owe it to themselves to just try it. In my opinion, the material is a game changer. We’ve had some small groups that have had exposure to the material, and the feedback is always along the lines of, “Wow, that’s amazing,” just like my own reaction when I first used it. Secondly, learn the correct protocol. As simple as that sounds, it’s easy to think that just because this material is like X, it can be handled just like that other material, which may not be correct. It’s important to follow the specific process for each material.
So try it, but take 10 minutes to learn the process. That way you can rest assured that you’re getting the best quality product as a result. I think clinicians are going to absolutely love the material and I’m excited about that.
 |
 |
|
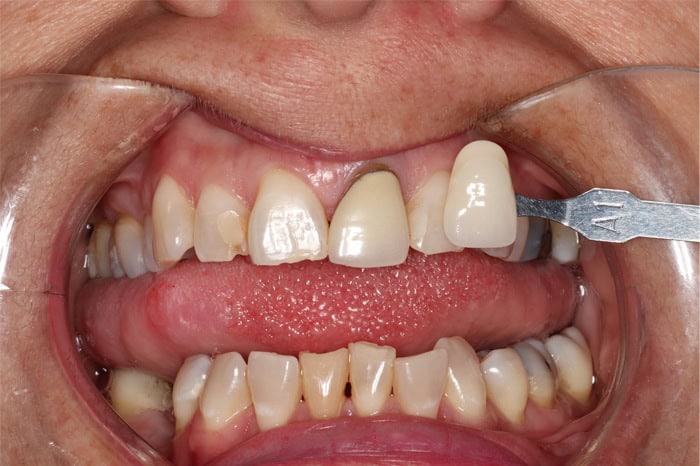
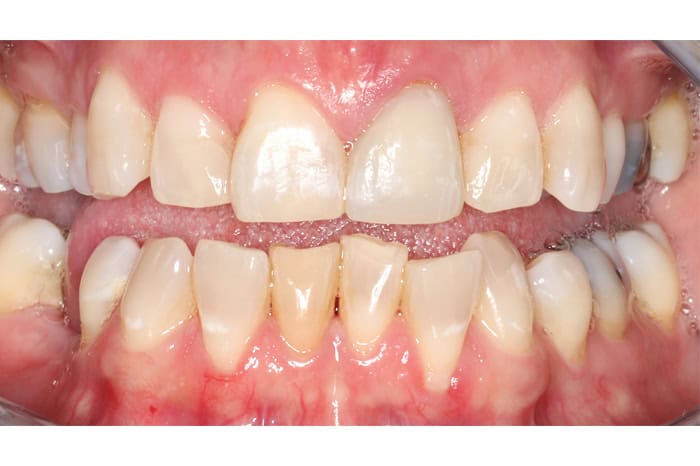
Case example (1) This patient presented with recurrent decay and compromised marginal integrity around a porcelain fused to metal crown. Treatment plan was to replace the crown on tooth #9 (21, FDI) in a single visit with CEREC Tessera. |
|
 |
 |
|
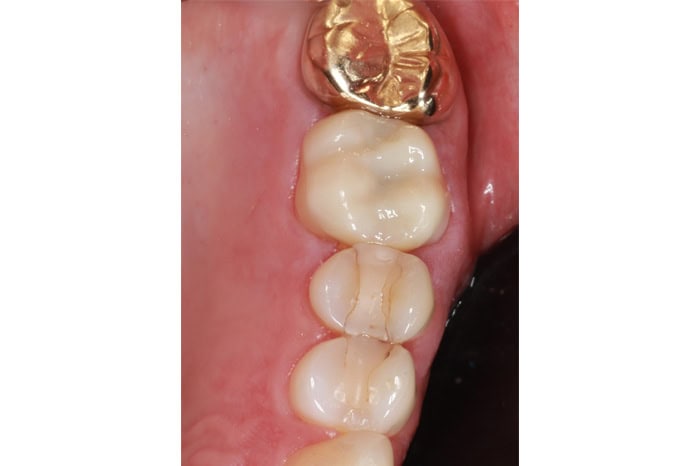
Case example (2) The patient presented with a failing complex alloy and new decay present on the mesial and distal aspects of the tooth. Patient was also having mild discomfort upon chewing. After clinical and radiographic examination, it was determined the best treatment option for the tooth 26 was to restore it with a full coverage crown. The treatment was performed in a single visit with CEREC Tessera. |
|
ABOUT THE AUTHOR
Dr. Andrew Hall is a general dentist and the owner of The Studio for Exceptional Dentistry in Colorado Springs, CO. He has worked with CEREC for many years and teaches courses on the technology as a faculty member of the Scottsdale Center for Dentistry.
RELATED ARTICLES
Dentsply Sirona’s Smart Integration Award to Salute Female Talent in Dentistry
Dentsply Sirona Award Recognizes Practice-Lab Collaborations

