Patients today place ever greater de-mands on dentists for superb dental care but want to have it done in as short a time span as possible. Patients simply do not have the option of taking time off from work or losing vacation and sick days for multiple dental appointments. For a dental practice to be successful it must also be efficient. This does not mean “cutting corners” or providing substandard care. It means providing outstanding care in the least amount of time. If the technology available today is used properly, it will allow dentists to provide their best care in shorter amounts of time and fewer appointments.
The following case report demonstrates the use of modern technologies and clinical techniques to meet the needs of a patient who required endodontic and restorative treatment of a tooth. The case report demonstrates how endodontic treatment and restoration of the tooth through the provisional crown phase was accomplished in a single appointment.
Case Report
 |
| Figure 1. Tooth No. 8 preoperatively. |
A 40-year-old male patient was having thermal sensitivity in tooth No. 8 (Figure 1). He had porcelain-fused-to-metal (PFM) crowns placed on both his maxillary central incisors 10 years prior. He gave the author a history of the tooth being sensitive to both hot and cold as well a biting pressure. Digital photographs (Canon 20D SLR Digital Camera with Canon 100-mm macro lens and ring flash, Norman Camera) as well as digital radiographs (Sidexis Digital Radiograph System, Sirona) were taken of the tooth. After displaying the photos with editing software (Image FX Soft-ware, Norman Camera) and discussing multiple options, the patient and author agreed upon root canal therapy on tooth No. 8 followed by replacing the core buildup and PFM crown. Due to the patient’s job, he wanted to have both the root canal and preparation for the crown done in a single appointment.
 |
| Figure 2. Shades of tooth No. 8 are captured with a digital camera. |
At the beginning of the restorative appointment the tooth shades were captured using the Canon digital camera for communication with the ceramist (Figure 2). In the past, shade maps had to be drawn for the ceramist’s accurate reproduction of the tooth. Now, all the information can be captured in a single or just a few digital photographs.
After anesthesia was given, the teeth were isolated with a rubber dam. Because a root canal and a bonded core were being performed, isolation was critical for optimum results. The rubber dam also increases the clinician’s field of view and frees up the assistant, who can better pass the different materials and instruments to the clinician.1
 |
 |
| Figure 3. Removal of incisal edge, exposing metal substructure. | Figure 4. Cutting through metal substructure for atraumatic crown removal. |
The procedure was started by removing the PFM crown. By removing the crown first, endodontic access is easier to obtain. A wheel-shaped diamond bur (G-Force Diamonds, Garrison Dental) along with a high-speed electric handpiece (7LP Electric Attachment, KaVo) was used to remove the incisal edge to the level of the metal substructure (Figure 3). Care was taken not to damage the opposing teeth. A crown preparation diamond bur (G-Force Diamonds, Garrison Dental) was used to perforate through the metal substructure on the facial surface (Figure 4). Care was taken to cut just through the metal and not deeply into the underlying tooth. This prevents the need to fill in any groove or damage made to the facial surface of the tooth.
 |
 |
| Figure 5. Removing failing crown. | Figure 6. Existing crown preparation. |
A crown remover hand instrument (Brasseler USA) was then used to “torque” the crown right and left. This breaks the cement seal, and the crown easily slides off. The entire time for crown removal from the beginning of prepping the incisal edge to having the remaining crown off was less than 3 minutes (Figures 5 and 6).
 |
 |
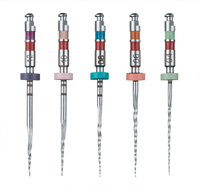
| Figures 7 and 8. Succession of endodontic files. | Figure 8. |
The same bur used to cut through the metal substructure was used gain access to the pulp chamber on the lingual side of the tooth. After the diamond bur entered the pulp chamber, a No. 6 round bur was used to open the chamber fully.2 Endodontic hand files in sizes 8, 10, 15, and 20 were used to negotiate the canal to the apex. A calcium chelating agent (File-Eze, Ultradent) and NaOHCl were used to lubricate the files. An apex locator (Elements Diagnostic Unit and Apex Locator, Sybron Endo) was used to determine that the entire length of the canal to the apex and just slightly beyond was negotiated. The number 8, 10, and 15 files were taken just past the apex, and the number 20 was taken to the apex (Figures 7 and 8). Apex locators have been shown to be more accurate than radiographs for determining working length if interpreted properly. This saves valuable time during the procedure.3
 |
 |
| Figure 9. Use of Ni-Ti files and cordless drill. | Figure 10. Drying canal with paper point. |
Nickel-titanium, engine-driven files (Endo Sequence, Brasseler USA) along with a cordless endodontic electric drill (Endo Sequence Electric Drill, Brasseler USA) were used to shape the canal to the opening of the apex. NaOHCL was used to lubricate the files during shaping. There was no bleeding during the entire cleaning and shaping of the canal in this case4 (Figure 9). Paper points (Endo Sequence, Brasseler) of the same size as the largest engine-driven file that reached the apex were used to dry the canal after irrigation with water. In this case a size 35 paper point was used (Figure 10).
 |
 |
| Figure 11. Gutta-percha try-in. | Figure 12. Measuring gutta-percha at length within canal. |
A gutta-percha point was then selected that matched the size of the file and paper point, and it was inserted into the dry canal. It was grabbed with cotton forceps at the same point as the silicone stop-per was placed to mark the length of the hand and engine-driven files. It was then placed onto an endodontic ruler (Sybron Endo) and confirmed that it went to working length (Figures 11 and 12).
Endodontic sealer (AH 26, DENTSPLY) was then mixed. The gutta-percha point was coated with the sealer by dragging it through the mix and seated to working length. It was then seared using a thermal endodontic heater (Touch and Heat, Sybron Endo). It was seared at the opening of the canal just below the CEJ (Figure 13).
 |
 |
| Figure 13. Completed root canal therapy. | Figure 14. Use of automix core build-up material. |
Because care was taken to preserve as much tooth structure as possible, a post was not needed to retain the core buildup. The access was etched with phosphoric acid for 15 seconds; it was then rewetted, and multiple coats of primer/bonding agent (Opti-bond Solo, Kerr Dental) were applied and air-thinned. A dual-cured core build-up material (Luxacore, DMG/Ze-nith) was then injected into the access and cured for 40 seconds with a LED curing light5 (Figure 14).
 |
 |
| Figure 15. Exposing crown margin with diode laser. | Figure 16. Margins exposed for refinement. |
 |
 |
| Figure 17. Refining of existing margins. | Figures 18 and 19. Final preparation. |
 |
| Figure 19. |
Lidocaine was then in-jected into the interproximal tissue slowly until the tissue began to blanch. A diode laser (ZAP 2-W Diode Laser, ZAP Lasers) was then used to expose the existing margins of the preparation so they could be refined. The tip of the fiber-optic cable was first initialized with carbon articulating paper. The laser was set to 1.6 W, and the tip was lightly held on the carbon paper while the laser was activated for 1 second. Once the tip was activated, it was used to expose the margins by moving the tip back and forth quickly within the sulcus. The diode laser produces no bleeding during tissue removal, and the tissue is cut very cleanly with each pass6 (Figures 15 and 16). Once the margins were exposed, the preparation was refined with the diamond burs and electric drills. The preparation was inspected for adequate reduction in the incisal, facial, and lingual planes (Figures 17 to 19).
Impressions can now be taken and a provisional res-toration made. The advantage of using a diode laser is that there is rarely any bleeding, so hemorrhagic control is not needed. This saves valuable time and helps to ensure an accurate impression.
CONCLUSION
With the use of efficient protocols and effective technology such as the latest in diamond burs, Ni-Ti endodontic files, electric drills, and diode lasers, multidisciplinary procedures can be carried out quickly and predictably. Pa-tients no longer need to come back for multiple appointments for different dental procedures such as root canal therapy and core buildups.
References
1. Wahl P. Endodontic isolation and radiography. Dent Today. 1996;15:92,94-95.
2. Alliet P, Berghmans J. [Pitfalls to avoid in the cleaning and shaping of the pulp canal]. Rev Belge Med Dent. 1999;54:282-308. (Article in French)
3. Dehon P, Van Nieuwenhuysen JP. [Electronic determination of the length of the root canal]. Rev Belge Med Dent. 1999;54:259-281. (Article in French.)
4. Himel VT, Levitan ME. Use of nickel titanium instruments for cleaning and shaping root canal systems. Tex Dent J. 2003;120:262-268.
5. Fokkinga WA, Kreulen CM, Creugers NH. [The restoration of endodontically treated teeth: the minimally invasive (post-) core buildup?] Ned Tijdschr Tandheelkd. 2003;110:250-254. (Article in Dutch.)
6. Adams TC, Pang PK. Lasers in aesthetic dentistry. Dent Clin North Am. 2004;48:833-860.
Dr. Soileau is a general dentist from Lafayette, La. His practice focuses on restorative rehabilitation and cosmetic enhancements. He lectures nationally and internationally on the use of digital photography and computer assistance for diagnosing, treatment planning, and performing comprehensive dental procedures. He is a consultant for several technologies-based dental manufacturers and beta tests many of their products. When Dr. Soileau is not lecturing, he is a consultant to several pageant coaches throughout the country. He has judged and worked with local and national Miss USA, Miss Teen USA, Miss America, and Mrs. America contestants. Dr. Soileau is co-director of digital photography for GenR8TNext digital photography courses, and has taught digital photography at the Institute of Oral Art and Design (IOAD) in Tampa, Fla, and the Pacific Aesthetic Continuum (PAC~Live) in San Francisco, Calif. At his courses he teaches dentists from all over the world the techniques he uses in his practice. His dental and photography skills can be seen on his Web site at smilesbysoileau.com. He can be reached at (337) 234-3551 or tony@smilesbysoileau.com.