For many years, the art of photography has been a useful tool to enhance the art of dentistry. While photography was primarily used for documentation of trauma cases, it also served a useful role for difficult shade matching of anterior teeth.
This article discusses some of the powerful uses of digital photography in the dental practice.
CASE STUDY: INTRODUCING PATIENTS TO THEIR TEETH AND CREATING PATIENT TRUST AND PARTNERSHIP
 |
 |
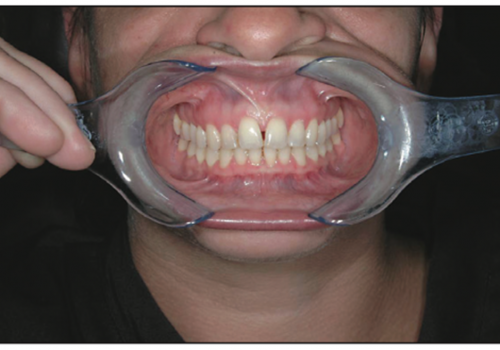
| Figure 1. Portrait of patient smiling. | Figure 2. This retracted view gives the patient a good close-up of teeth and tissue. |
A minimum of 4 photographs are taken at a new patient exam. Each shot is used for a different purpose. The first is a portrait of the patient smiling (Figure 1). This is probably one of the most important views, for 2 reasons. First, it allows patients to see themselves as their friends and colleagues see them. Second, it allows the patient and dentist to candidly critique the smile. It is important to let the patients respond to the photo first, rather than have their reactions influenced by the comments of the dentist. In many cases, what the dentist perceives as a problem area may be completely acceptable to the patient. This photo can also be used in the patient’s chart for identification purposes. It can be updated when necessary.
 |
 |
| Figures 3 and 4. These occlusal views allow patients to take ownership of their needs. |
The third and fourth shots are the maxillary and mandibular occlusal views (Figures 3 and 4). These are the most compelling photos. The best approach when presenting these to the patient is to let the pictures speak for themselves. The advantage of this particular view is that it allows both patient and dentist to view and scrutinize all the adjacent teeth. In most cases, one of the posterior teeth will likely have a huge amalgam restoration. The dentist may point out how the tooth is in need of treatment. The dentist is now able to promote how a crown or an onlay would strengthen the tooth. This initiates a conversation, which is an important step in establishing trust. It also promotes mutual partnership for discussing the age and condition of older, perhaps unstable restorations.
 |
 |
| Figures 5 and 6. Using dental software, these areas can be magnified to see every detail. |
 |
 |
 |
 |
| Figures 7 through 10. Close-up quadrant shots can be successfully taken with digital cameras, but are usually not necessary when using your dental software. |
 |
 |
|
Figure 11. Photograph of a stick bite that helps the ceramist get the incisal edges parallel to the interpupillary line |
Figure 12a. Preoperative photograph. |
 |
 |
| Figure 12b. This postoperative photograph with provisionals allows the dentist and ceramist to visualize the third dimension (as seen on a diagnostic waxup) in the mouth. | Figure 13. A preview of the patient’s new smile can be created doing a computer simulation. |
The dentist can use the zoom feature to examine specific areas in a quadrant (Figure 5). A similar evaluation can be performed on the opposite side (Figure 6). The photography promotes patient education toward specific problems, and at the same time, focuses on quadrant dentistry. For example, one approach might be to say, “Mrs. Jones, while we are doing a crown on that molar, let’s also address the other teeth in that same area because you are already going to be numb.” This approach is a powerful patient motivator. It can address the patient’s multiple needs and accomplish a variety of tasks on a quadrant basis. Close-up views of all 4 quadrants can be taken (Figures 7 through 10), but are not needed the majority of the time.
TELLING YOUR STORY THROUGH PHOTOGRAPHY
Imaging or computer simulations are also great marketing techniques for your dental practice. With digital photography, you can take a patient portrait, load it into the computer, and in 5 to 10 minutes have a simulation of what a “new” smile could look like (Figure 13). As several programs now exist, consider these options to support your marketing services, especially the simulation programs. One program successfully used in this office is Digident (by David Traub) with the Lorin Library. The simulation models provide a powerful presentation as well as help the dentist see another dimension in smile design.
 |
 |
| Figure 14. These are digital pictures of bitewings taken on a view box. | Figure 15. A great starter camera, the Canon G3. |
 |
 |
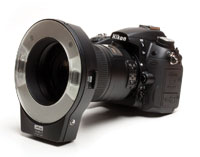
| Figure 16. Canon’s flagship digital camera, the 10D. | Figure 17. These retractors make it easy for a single team member to take the pictures. |
 |
| Figure 18. These mirrors are a must for great intraoral photography. |
THE POWER OF POWERPOINT
How many times have you thought, “If I could just find a way to pull all the pieces together, then I could really show my patient all their choices. But who has time to create an individualized presentation?”
SELECTING THE RIGHT EQUIPMENT FOR THE RIGHT PROJECT
If these projects sound like they would enhance your dental practice, then you need to proceed from the beginning. The first and most important step is to find the camera that will best suit your needs and your budget. There are many digital cameras to choose from. A camera that has a 3- or 4-megapixel capacity will be very appropriate to view image imported into a computer system. The Canon G3 (Figure 15) delivers resolution that is needed to take pictures like those presented in this article. The images captured will be suitable to create all the projects described. Other nice features about this particular camera are its compact size and its user-friendly function. This helps when you must train your staff in digital photography. Take advantage of your well-trained and highly skilled staff.
HARDWARE AND SOFTWARE OPTIONS
A computer system and appropriate software are the prerequisite tools for these projects. Many dental offices already have an operating system in place. If you do not, consider a quality laptop unit. Because images take up a lot of space, make sure the laptop has sufficient memory and storage capacity (RAM). Slower systems will be frustrating to use. Portability makes laptops a nice choice. You can take them from room to room in the office and also to your home to prepare case presentations.
CONCLUSION
Digital photography has truly changed the way I practice dentistry. It allows me to record an image and then incorporate that image for multiple applications. Making and keeping these photo images has multiple benefits. First, it eliminates regrets by enabling you to take pictures of each one of your cases. Second, it offers a superb opportunity to demonstrate capability to patients. Third, it is a user-friendly resource to initiate communication and establish trust between the dentist and the patient.
Acknowledgement
The author would like to thank Dr. Tom Hedge (Digital Dentistry) for his benchmark work in digital photography and for his inspiration to pursue this work in my own career.
Dr. Burns has an aesthetic and implant oriented practice in New Market, Va. He is a graduate of the Midwest Implant Institute under the direction of Dr. Duke Heller. He has attended Pac-live and has studied with Dr. Tom Trinkner and Matt Roberts. He is currently pursuing accreditation status in the American Academy of Cosmetic Dentistry. Dr. Burns can be reached at (540) 740-8937, at drj@jburnsdds.com, or visit jeffreyburns.com.