Written by: Drs. Richard Trushkowsky, Amy Chen, Peter Irving, Guy E. Carnazza, and Juliana Gil Andrade e Silva
Introduction
Aesthetic dentistry is a growing branch of dentistry that focuses on enhancing a patient’s appearance. Aesthetic dentistry encompasses a range of procedures, including conservative restorative treatments, smile design, orthodontic procedures, veneers, microabrasion, bleaching, and resin infiltration (Icon [DMG America]). A variety of surface imperfections can create critical aesthetic considerations. These qualities can also show a disturbance in normal tooth development. This has led to various aesthetic techniques, with varying levels of invasiveness and tissue preservation. Dental fluorosis, a demineralization of enamel caused by excessive fluoride intake, results in opaque white areas or discolorations ranging from yellow to deep brown, as well as porosities on the enamel surface.1,2
Dental fluorosis is not the only cause for enamel demineralization. Opaque white areas or discolorations, even with porosities, might result from some disruptions in the mineralization process, and they might be confused with fluorosis stains. We find that their location can distinguish them: stains caused by dental fluorosis are generally encountered on all teeth that mineralize at the same time, and fluorosis stains are also characterized as non-discrete, opaque conditions of the enamel.3
We must consider a range of factors before treatment, including the patient’s age, oral health, the severity of fluorosis, and aesthetic goals. Considering that a sizable proportion of individuals seeking treatment for dental fluorosis are usually young, selecting prosthodontic treatment can lead to premature and irreversible loss of substantial tooth structure and long-term consequences. Therefore, we typically recommend minimally invasive procedures. Fluorosis stains are usually treated based on 3 concepts: vital bleaching, microabrasion, a combination of both methods, and resin infiltration. Direct or indirect composite restorations, porcelain veneers, or crowns are other, more invasive options.4-6
The clinical presentations of milder fluorosis include narrow white lines following the parenchyma, cuspal snow capping, and a snow-flaking manifestation that lacks a clear border with the unaffected area of enamel.7 While in severe fluorosis, there is yellow to deep brown staining, and the most severe cases show pitting of the surfaces due to extrinsic mechanical breakdown.8,9
The 2 case reports will illustrate several conservative techniques, including bleaching, microabrasion, resin infiltration, and direct composite, used to enhance the aesthetic appearance of 2 patients. The first case primarily presents dark teeth and white spots, while the second case shows severe fluorosis.
Case Report 1
A 28-year-old female patient presented to the clinic with the chief complaint of discoloration and chipping on anterior teeth. Initial photographs, a series of radiographs, videos, and intraoral scans of both arches were taken during the patient’s first visit following the consultation. Intraoral examination revealed multiple regions of white spot lesions on the labial surface of upper anterior teeth and chipping on the No. 8 incisal edge (Figure 1). The patient wanted to preserve the tooth structure and have her teeth whiter, with the discolorations improved in the most economical way possible. A treatment plan of in-office external bleaching in combination with Icon Smooth Surface (DMG America), and composite bonding was proposed, and the patient accepted it.


The initial shade of teeth was A3 (Figure 2). External bleaching was performed in the clinic with Opalescence Boost Teeth Whitening, 40% hydrogen peroxide (Ultradent). Liquid dam (OpalDam resin barrier [Ultradent]) was first placed for protection of the gingiva, followed by placement of a 0.5- to 1-mm thick layer of bleaching gel on the labial surface of anterior teeth (Figure 3).


A total of 2 rounds of bleaching were done. For the first round, the bleaching gel remained on the teeth for 20 minutes. After removing all the bleaching agents, shade evaluation was done.
A decision was made to proceed to the second round for only 10 minutes due to pronounced white spots observed after the bleaching procedure. The resulting shade was A2 (Figure 4). The patient still exhibited white spots, and it was believed that resin infiltration of these spots would yield improved results, as illustrated by transillumination (Figure 5).


After the bleaching, the patient was instructed to wait for 2 weeks before the resin infiltration treatment.10 The Icon Smooth Surface treatment (DMG America]) was performed on the upper premolar to premolar regions (Figure 6). The treatment procedure is as follows: The upper arch was adequately isolated with a rubber dam and double-ligature floss (Figure 7). Before the resin infiltration was applied, Figure 7 shows that an ample amount of Icon-Etch (Hydrochloric acid 47%) (DMG America) was applied to each tooth, with constant scrubbing of the tooth surface using adequate pressure, focusing on the lesion location with the provided tip for 3 minutes. Excess etch was aspirated with high-power suction, and the teeth were rinsed for 30 seconds with water, then air-dried with water-free/oil-free air. One to 2 drops of Icon-Dry (Ethanol 99%) (DMG America) were applied to each tooth as a preview of the results. The etchant was reapplied to the affected tooth for better results, with a total of 4 rounds of etching applied. After finishing the last 2 rounds, the etchant was applied only to the lesion spots that were still visible. A preview of the results with Icon-Dry was confirmed after each round of etchant application. Icon-Infiltrant (Methacrylate base resin matrix, 99%) (DMG America) was applied to each tooth, with the syringe occasionally twisted and the material dabbed onto the tooth to allow it to absorb. Infiltrate was left on the tooth for 3 minutes, then dispersed with water-free, oil-free air. The interproximal areas were flossed to prevent closure of the contact points. Infiltrate was light-cured for 40 seconds on all surfaces. After the Icon-Infiltration was applied, the white spots were no longer visible (Figure 8).


The patient was satisfied with the results, and a follow-up appointment was scheduled 6 weeks later. As the results met the patient’s satisfaction, the restoration of the No. 8 incisal edge was performed using composite resin (3M Filtek [Solventum]) (Figure 9).

Case Report 2
A 21-year-old female presented with the chief complaint of being self-conscious about her smile due to brown discolorations and pitting on her anterior teeth (Figure 10). She also exhibited a narrow arch form, with mild crowding in the maxillary arch and moderate crowding in the mandibular arch.


Clinical and Medical History
- Medical Status: Generally healthy, taking amitriptyline (25 mg qhs) and naproxen (500 mg BID) for chronic tension headaches, plus magnesium supplements.
- Dental Findings: Severe fluorosis noted across anterior teeth, including brown spots and areas of hypoplastic enamel. Orthodontic evaluation revealed a V-shaped mandibular arch and Class I molar/canine relationships.
Diagnostic Assessment
- Visual and Tactile Examination: Significant enamel pitting and discoloration consistent with severe fluorosis.
- Transillumination: Confirmed that most stains were within the superficial and mid-enamel layers.
- Radiographic Examination: Used to rule out any underlying pathology and to assess overall tooth structure in preparation for restorative and orthodontic needs.
- Orthodontic Analysis: Revealed narrow arches and crowding, indicating a need for future orthodontic intervention.
Initial photographs, a series of radiographs, videos, and intraoral scans of both arches were taken during the patient’s first visit following the consultation. After reviewing the patient’s history, which included previous residence in Kenya, it was determined that the discolorations were likely due to fluorosis. Excess fluoride in drinking water is a significant public health concern in Kenya, particularly in areas that rely on groundwater. High fluoride levels, often exceeding the World Health Organization’s recommended guideline of 1.5 mg/L, can lead to dental and skeletal fluorosis. Kenya’s Rift Valley region is known for its volcanic rocks, which can contribute to high fluoride concentrations in groundwater.11 After a 4-week whitening protocol using 10% carbamide peroxide (Opalescence 10% [Ultradent]), residual deep lesions were removed via microabrasion (Figure 11).

Opalustre (Ultradent) is a 6.6% hydrochloric acid slurry with silicon carbide microparticles, created to provide the strength of a chemical stain removal product while offering the gentle scrubbing power of an abrasion slurry. OpalCups (Ultradent) are great for micro-polishing newly treated enamel surfaces. The latch-type bristle polishing cups facilitate a more aggressive action and minimize splatter when used in conjunction with the Opalustre microabrasion technique. It is recommended to apply a 1-mm thick layer of Opalustre over the discolored area using a rubber prophy cup. Apply medium to heavy pressure at approximately 500 rpm for 60 seconds at a time. Opalustre, along with OpalCups, can be used to quickly remove unsightly enamel decalcification defects that are less than 0.2 mm in depth. It is especially important to adequately protect the soft tissues by using a rubber dam and, if desired, a light-cured resin barrier at the gingival margin. Once complete, suction the paste from the teeth and rinse.
Tip: If the product starts to thin out during the procedure, you can add more Opalustre, which will keep the tooth moist and prevent overheating.
Once you have suctioned and rinsed, evaluate results and repeat, as necessary (Figure 12).

Note: For patients with hypomineralization greater than 0.1 to 0.3 mm, use a fine-grit, water-cooled, tapered diamond bur and lightly sweep over the stained area for 5 to 10 seconds before applying Opalustre. This may allow greater penetration.
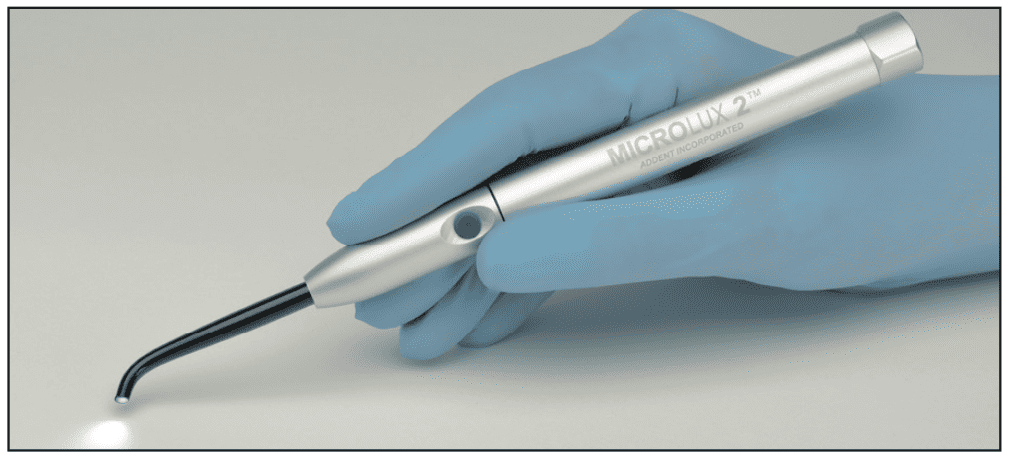
There will be some patients with areas of deep hypo-mineralization and staining that may not respond to treatment and may require aesthetic bonded restorations. This can be evaluated by transillumination (Microlux 2 Transilluminator [AdDent Inc]) as shown in Figure 13.

- Transillumination confirmed that most stains were within the superficial and mid-enamel layers.
In this case, we recommend waiting at least 2 weeks after all whitening before placing the needed aesthetic restorations. This was done to ensure appropriate bond strengths and color stability.
Composite Resin Restorations
- Selective Removal: Residual brown areas were conservatively excavated with a round diamond bur at low speed.
- Isolation: Rubber dam placement to ensure a clean, dry field.
- Adhesive Protocol: 35% phosphoric acid etchant applied for 15 seconds, rinsed, and lightly air-dried. Then, a universal bonding agent was applied, air-thinned, and light-cured per manufacturer guidelines.
- Composite Placement: Incremental layering with BL Dentine and BL Enamel shades (Ivoclar) to mimic natural translucency. Each layer was assessed for shade before final curing.
- Finishing and Polishing: Contouring with fine-grit diamond burs. Polishing with disks and pastes to achieve a high-luster surface.
- Occlusal Adjustment: Verified to ensure no premature contacts on the new restorations.
The patient’s smile improved considerably, with no postoperative complications reported. She was then referred for orthodontic treatment to address malocclusion, functional alignment, and to finalize aesthetic treatment.
The patient expressed high satisfaction with the conservative treatment approach. No adverse effects were observed, and the restorations blended seamlessly with the adjacent teeth (Figures 14 and 15).


DISCUSSION
Tooth discoloration may arise from multiple etiologies, making accurate diagnosis essential for selecting appropriate treatment. Clinicians must identify the cause, location, and extent of defects before initiating therapy. Discolorations may occur during tooth formation or after eruption. Enamel opacities can result from damage to the dental follicle, carcinogenic activity, fluorosis, traumatic hypocalcification, molar-incisor hypomineralization (MIH), or caries-related white spot lesions (WSLs). In the second case presented, fluorosis was identified as the cause, while the etiology of the first case remained undetermined.
A favorable result of diverse treatment approaches suggested that managing fluorosis cases depends on the extent of the defect.12 Numerous clinical studies focusing on the conservative management of these defects have blended various techniques, including teeth whitening, abrasion (micro/macro), and infiltration with resin. The primary distinction among these cases lies in the order of these treatments.13 Dental fluorosis is an enamel malformation caused by excessive systemic fluoride input during the maturation of the enamel tissue. The late secretion and maturation stages of enamel tissue are affected by excessive fluoride.14
Fluoride interferes with enamel matrix protein reabsorption and increases calcium-driven mineralization,15 leading to subsurface porosity and color changes ranging from opaque white to yellow-brown, sometimes accompanied by tissue loss.16 Microabrasion and bleaching remain the most conservative and predictable treatments for mild to moderate fluorosis.17,18
Microabrasion involves softening enamel with acid and mechanically removing surface discoloration using abrasive agents. Croll19 described an early technique using 18% hydrochloric acid and pumice. The procedure produces a smoother, more reflective aprismatic enamel surface that masks discoloration and creates a denser, more mineral-rich, and resistant structure.20
Developmental white enamel lesions affect 9% to 68% of permanent dentition,21-25 while acquired lesions—commonly after orthodontic treatment—range from 2% to 96%. These lesions compromise aesthetics, particularly on maxillary anterior teeth.26 WSLs appear white due to mineral loss and altered refractive indices between enamel, water, and air within porous structures, resulting in reduced translucency and luster.27,28 Lesion color intensity correlates with lesion volume,29 and lesion depth strongly influences treatment selection.
Depth assessment may be performed using transillumination, in which a curing light is placed on the lingual surface. Superficial areas transmit light easily, while deeper lesions appear darker.30,31 Deeper lesions often require surface modification to permit resin infiltration, originally designed for superficial carious lesions. After mechanical and chemical conditioning, lesions exhibit more uniform structure and defined margins under transmitted light. Ethanol application and transillumination assist in predicting infiltration success. Fiber optic transillumination (FOTI) can further evaluate lesion depth and opacity. Using Microlux 2 Transilluminator, the discoloration is revealed for its depth and diffuse opacities on the enamel surface (Figure 16). The undesirable edge effect mentioned in the literature indicates that sound enamel remains on top of the lesion, suggesting that resin infiltration is a topography-dependent event.32 Some authors recommend a modified microabrasion protocol using 15% hydrochloric acid (Icon-Etch) with pumice to enhance resin penetration in deeper lesions.33
Adjunctive preventive therapies include topical fluoride, which strengthens enamel, reverses early lesions, and reduces sensitivity, although results are gradual. CPP-ACP products such as MI Paste (GC America) support remineralization and are compatible with fluoride but contraindicated in patients with milk protein or hydroxybenzoate allergies.
Resin infiltration fills enamel pores with low-viscosity resin, reducing light scattering and permeability.34 These infiltrants penetrate mineral-deficient regions via capillary action while preserving hydroxyapatite structure.35 Icon-Infiltrant consists of TEGDMA-based monomers and ethanol, offering an exceptionally high penetration coefficient.36 Effective surface erosion requires 90 to 120 seconds of hydrochloric acid etching, consistent with manufacturer recommendations.37-39 Although Icon may discolor over time, a 2014 study demonstrated that limiting exposure to staining foods and beverages improves long-term aesthetic outcomes.40
CONCLUSION
A favorable result can be achieved with one or a combination of minimally invasive techniques. This was illustrated in the 2 cases presented, which used bleaching (in-office or at-home), microabrasion, or resin infiltration. Aesthetic alteration of teeth with mild to moderate fluorosis can be conducted by minimally invasive treatment using microabrasion. In addition, using the transillumination techniques during the application of Icon-Dry and Icon-Infiltrant enhances visualization and aids in the predictability of the procedure. Using the transillumination technique helps decide the depth of both white spot and fluorosis staining before starting treatment, to ascertain whether more invasive procedures may be required, such as direct composite placement or porcelain veneers.
The effective handling of hypo-mineralized areas depends on a thorough assessment of the defect’s extent and a careful examination of the results following every phase of the intervention. Patient satisfaction and the patient’s age will determine whether more intrusive treatment is required.
REFERENCES
1. Robinson PG, Nalweyiso N, Busingye J, et al. Subjective impacts of dental caries and fluorosis in rural Ugandan children. Community Dent Health. 2005;22(4):231–6.
2. Sujak SL, Abdul Kadir R, Dom TN. Esthetic perception and psychosocial impact of developmental enamel defects among Malaysian adolescents. J Oral Sci. 2004;46(4):221–6. doi:10.2334/josnusd.46.221
3. An epidemiological index of developmental defects of dental enamel (DDE Index). Commission on Oral Health, Research and Epidemiology. Int Dent J. 1982;32(2):159–67.
4. Ardu S, Stavridakis M, Krejci I. A minimally invasive treatment of severe dental fluorosis. Quintessence Int. 2007;38(6):455–8.
5. Pontes DG, Correa KM, Cohen-Carneiro F. Re-establishing esthetics of fluorosis-stained teeth using enamel microabrasion and dental bleaching techniques. Eur J Esthet Dent. 2012;7(2):130–7.
6. Rodd HD, Davidson LE. The aesthetic management of severe dental fluorosis in the young patient. Dent Update. 1997;24(10):408–11.
7. Vallejos-Sánchez AA, Medina-Solís CE, Casanova-Rosado JF, et al. Dental fluorosis in cohorts born before, during, and after the national salt fluoridation program in a community in Mexico. Acta Odontol Scand. 2006;64(4):209–13. doi:10.1080/00016350600555537
8. Fomon SJ, Ekstrand J, Ziegler EE. Fluoride intake and prevalence of dental fluorosis: trends in fluoride intake with special attention to infants. J Public Health Dent. 2000;60(3):131–9. doi:10.1111/j.1752-7325.2000.tb03318.x
9. Levy SM. An update on fluorides and fluorosis. J Can Dent Assoc. 2003;69(5):286–91.
10. Moon HJ. Treatment after bleaching for optimal bonding. Restor Dent Endod. 2015;40(2):177–8. doi:10.5395/rde.2015.40.2.177
11. Mwiathi NF, Gao X, Li C, et al. The occurrence of geogenic fluoride in shallow aquifers of Kenya Rift Valley and its implications in groundwater management. Ecotoxicol Environ Saf. 2022;229:113046. doi:10.1016/j.ecoenv.2021.113046
12. El Mourad AM. Aesthetic rehabilitation of a severe dental fluorosis case with ceramic veneers: a step-by-step guide. Case Rep Dent. 2018;2018:4063165. doi:10.1155/2018/4063165
13. Zakaria Aboelenein A, Ismail Riad M, Fouad Haridy M. Case report: In‑office bleaching, microabrasion, and resin infiltration for the correction of hypomineralized esthetic defects. F1000 Res. 2019;8:989. doi:10.12688/f1000research.19697.1
14. Larsen MJ, Richards A, Fejerskov O. Development of dental fluorosis according to age at start of fluoride administration. Caries Res. 1985;19(6):519–27. doi:10.1159/000260892
15. Aoba T, Fejerskov O. Dental fluorosis: chemistry and biology. Crit Rev Oral Biol Med. 2002;13(2):155–70. doi:10.1177/154411130201300206
16. Ng F, Manton DJ. Aesthetic management of severely fluorosed incisors in an adolescent female. Aust Dent J. 2007;52(3):243–8. doi:10.1111/j.1834-7819.2007.tb00495.x
17. Lynch CD, McConnell RJ. The use of microabrasion to remove discolored enamel: a clinical report. J Prosthet Dent. 2003;90(5):417–9. doi:10.1016/s0022-3913(03)00503-1
18. Limeback H, Vieira AP, Lawrence H. Improving esthetically objectionable human enamel fluorosis with a simple microabrasion technique. Eur J Oral Sci. 2006;114(Suppl 1):123–9. doi:10.1111/j.1600-0722.2006.00317.x
19. Croll TP. Enamel microabrasion: observations after 10 years. J Am Dent Assoc. 1997;128 Suppl:45S-50S. doi:10.14219/jada.archive.1997.0424
20. Fragoso LS, Lima DA, de Alexandre RS, et al. Evaluation of physical properties of enamel after microabrasion, polishing, and storage in artificial saliva. Biomed Mater. 2011;6(3):035001. doi:10.1088/1748-6041/6/3/035001
21. Drummond B, Kilpatrick N. Planning and Care for Children and Adolescents with Dental Enamel Defects: Etiology Research and Contemporary Management. Springer; 2015:15-30.
22. Gorelick L, Geiger AM, Gwinnett AJ. Incidence of white spot formation after bonding and banding. Am J Orthod. 1982;81(2):93–8. doi:10.1016/0002-9416(82)90032-x
23. Mizrahi E. Enamel demineralization following orthodontic treatment. Am J Orthod. 1982;82(1):62–7. doi:10.1016/0002-9416(82)90548-6
24. Ogaard B, Rølla G, Arends J. Orthodontic appliances and enamel demineralization. Part 1. Lesion development. Am J Orthod Dentofacial Orthop. 1988;94(1):68-73. doi:10.1016/0889-5406(88)90453-2
25. Mitchell L. Decalcification during orthodontic treatment with fixed appliances—an overview. Br J Orthod. 1992;19(3):199-205. doi:10.1179/bjo.19.3.199
26. Maxfield BJ, Hamdan AM, Tüfekçi E, et al. Development of white spot lesions during orthodontic treatment: perceptions of patients, parents, orthodontists, and general dentists. Am J Orthod Dentofacial Orthop. 2012;141(3):337–44. doi:10.1016/j.ajodo.2011.08.024
27. Cazzolla AP, De Franco AR, Lacaita M, et al. Efficacy of 4-year treatment of icon infiltration resin on postorthodontic white spot lesions. BMJ Case Rep. 2018;2018:bcr2018225639. doi:10.1136/bcr-2018-225639
28. Paula AB, Fernandes AR, Coelho AS, et al. Therapies for white spot lesions—a systematic review. J Evid Based Dent Pract. 2017;17(1):23-38. doi:10.1016/j.jebdp.2016.10.003
29. Tüfekçi E, Pennella DR, Mitchell JC, et al. Efficacy of a fluoride-releasing orthodontic primer in reducing demineralization around brackets: an in-vivo study. Am J Orthod Dentofacial Orthop. 2014;146(2):207–14. doi:10.1016/j.ajodo.2014.05.016
30. Attal JP, Atlan A, Denis M, et al. White spots on enamel: treatment protocol by superficial or deep infiltration (part 2). Int Orthod. 2014;12(1):1-31. doi:10.1016/j.ortho.2013.12.011
31. Kobayashi TY, Vitor LLR, Carrara CFC, et al. Dental enamel defect diagnosis through different technology-based devices. Int Dent J. 2018;68(3):138–43. doi:10.1111/idj.12350
32. Denis M, Atlan A, Vennat E, et al. White defects on enamel: diagnosis and anatomopathology: two essential factors for proper treatment (part 1). Int Orthod. 2013;11(2):139–65. doi:10.1016/j.ortho.2013.02.014
33. Iatarola BO, Portela Pereira T, Shimizu Mori R, et al. Modified microabrasion protocol associated with resin infiltration. Two case reports. Int J Esthet Dent. 2025;20(3):268–83.
34. Puleio F, Fiorillo L, Gorassini F, et al. Systematic review on white spot lesions treatments. Eur J Dent. 2022;16(1):41–8. doi:10.1055/s-0041-1731931
35. Li M, Yang Z, Huang Y, et al. In vitro effect of resin infiltrant on resistance of sound enamel surfaces in permanent teeth to demineralization. PeerJ. 2021;9:e12008. doi:10.7717/peerj.12008
36. Prodan D, Moldovan M, Chisnoiu AM, et al. Development of new experimental dental enamel resin infiltrants—synthesis and characterization. Materials (Basel). 2022;15(3):803. doi:10.3390/ma15030803
37. Meyer-Lueckel H, Paris S, Kielbassa AM. Surface layer erosion of natural caries lesions with phosphoric and hydrochloric acid gels in preparation for resin infiltration. Caries Res. 2007;41(3):223–30. doi:10.1159/000099323
38. Paris S, Dörfer CE, Meyer-Lueckel H. Surface conditioning of natural enamel caries lesions in deciduous teeth in preparation for resin infiltration. J Dent. 2010;38(1):65-71. doi:10.1016/j.jdent.2009.09.001
39. Mazzitelli C, Josic U, Maravic T, et al. An insight into enamel resin infiltrants with experimental compositions. Polymers (Basel). 2022;14(24):5553. doi:10.3390/polym14245553
40. Rey N, Benbachir N, Bortolotto T, et al. Evaluation of the staining potential of a caries infiltrant in comparison to other products. Dent Mater J. 2014;33(1):86-91. doi:10.4012/dmj.2013-241
ABOUT THE AUTHORS
Dr. Trushkowsky had a private practice in Staten Island since 1978 (currently retired) and is an adjunct clinical professor and associate director at the Apa Advanced Program for International Dentists in Esthetic Dentistry at NYU dental. He is a Fellow in the Academy of Dental Materials, Academy of General Dentistry, Pierre Fauchard Academy, International College of Dentists, and the American College of Dentists. He is a reviewer for many peer-reviewed journals. He has authored over 100 articles in a variety of publications, several book chapters, was a co-editor twice of issues of Dental Clinics of North America, editor of a book on porcelain veneers published by Springer and has lectured at major dental meetings and universities. He can be reached at [email protected].
Dr. Chen is a dentist with training in prosthodontics and aesthetic dentistry. She earned her dental degree in Madrid, Spain, and completed a Master’s degree in prosthodontics in Valencia, where she developed a foundation in restorative dentistry. Dr. Chen is currently a Chief Fellow in the NYU Advanced Clinical Fellowship in Aesthetic Dentistry in New York. Her clinical interests focus on minimally invasive dentistry, restorative aesthetic treatments, and digital workflows for diagnosis and treatment planning. She can be reached at [email protected].
Dr. Irving earned his dental degree from King’s College London and is now a Chief Fellow in the Apa Advanced Clinical Fellowship in Aesthetic Dentistry at NYU. In addition to treating complex cases, he mentors other dentists. His work focuses on bringing health, function, and beauty together in modern dentistry. Dr. Irving uses minimally invasive techniques to create natural-looking results that protect long-term health. He can be reached at [email protected].
Dr. Carnazza graduated from Tufts University School of Dental Medicine in 1996. From there, he completed a 1-year GPR at Kings County Hospital/SUNY Downstate in Brooklyn, New York. He has pursued continuing education in implant and aesthetic dentistry, a 2-year program in surgical and prosthetic treatment at the NYU College of Dentistry, and the Aesthetic Advantage at NYU. He currently maintains a private practice limited to aesthetic and implant reconstruction in East Rockaway, New York and have been a professor at NYU College of Dentistry for the past 6 years in the Esthetic Fellowship program. He can be reached at [email protected].
Dr. Gil Andrade e Silva received her dental degree from the University of São Paulo, Brazil. She completed her specialization in Restorative Dentistry at the University of São Paulo and her Residency in Prosthodontics at the Hospital for Craniofacial Anomalies, University of São Paulo. She subsequently completed a Clinical Fellowship in Esthetic Dentistry at New York University College of Dentistry (NYUCD). Dr. Gil is currently a Clinical Assistant Professor in the Department of Cariology and Comprehensive Care at NYU College of Dentistry. She is faculty in the Clinical Fellowship in Esthetic Dentistry and in Operative and Digital Dentistry, and Course Director of Multispecialty Dentistry in the Chief Fellow Program. Her clinical, teaching, and research interests focus on esthetic and restorative dentistry, digital workflows, minimally invasive techniques, and contemporary restorative materials. She can be reached at [email protected].
Disclosures: The authors report no disclosures.
FREE CE WEBINAR

Dr. Richard Trushkowsky will be hosting a FREE CE WEBINAR with us on April 30 at 8 PM (EST).